

Step 1: Research
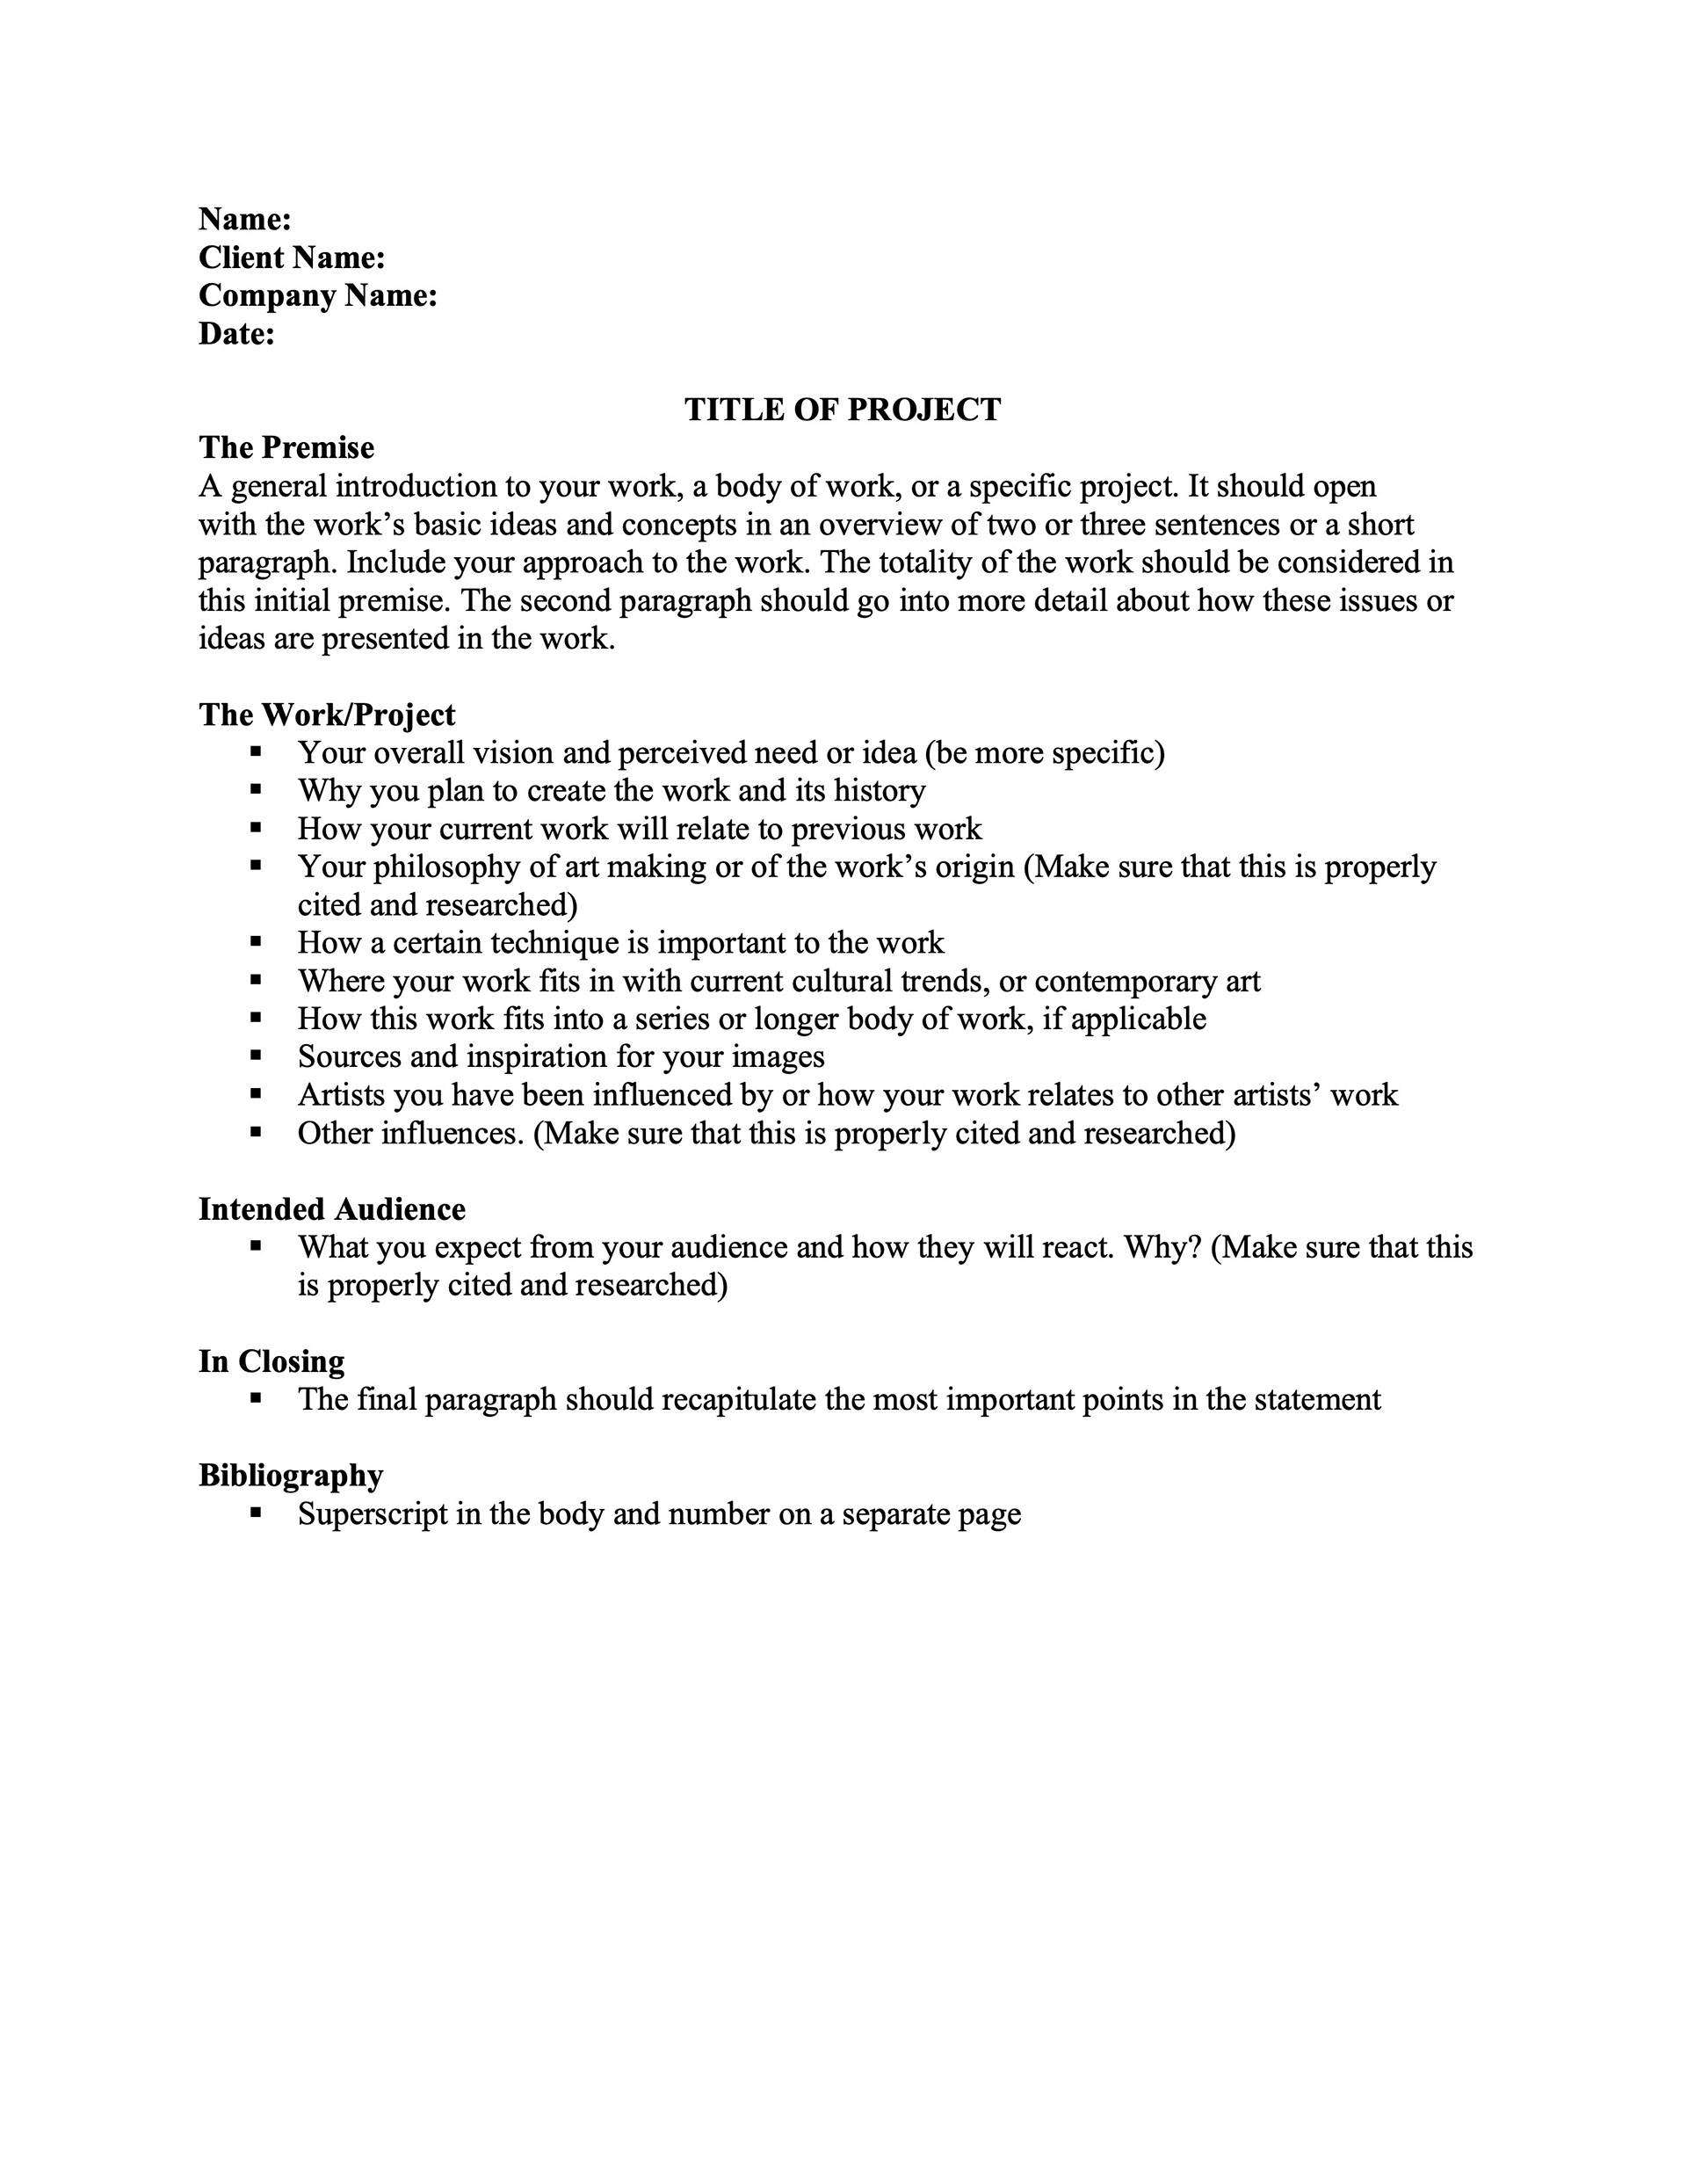
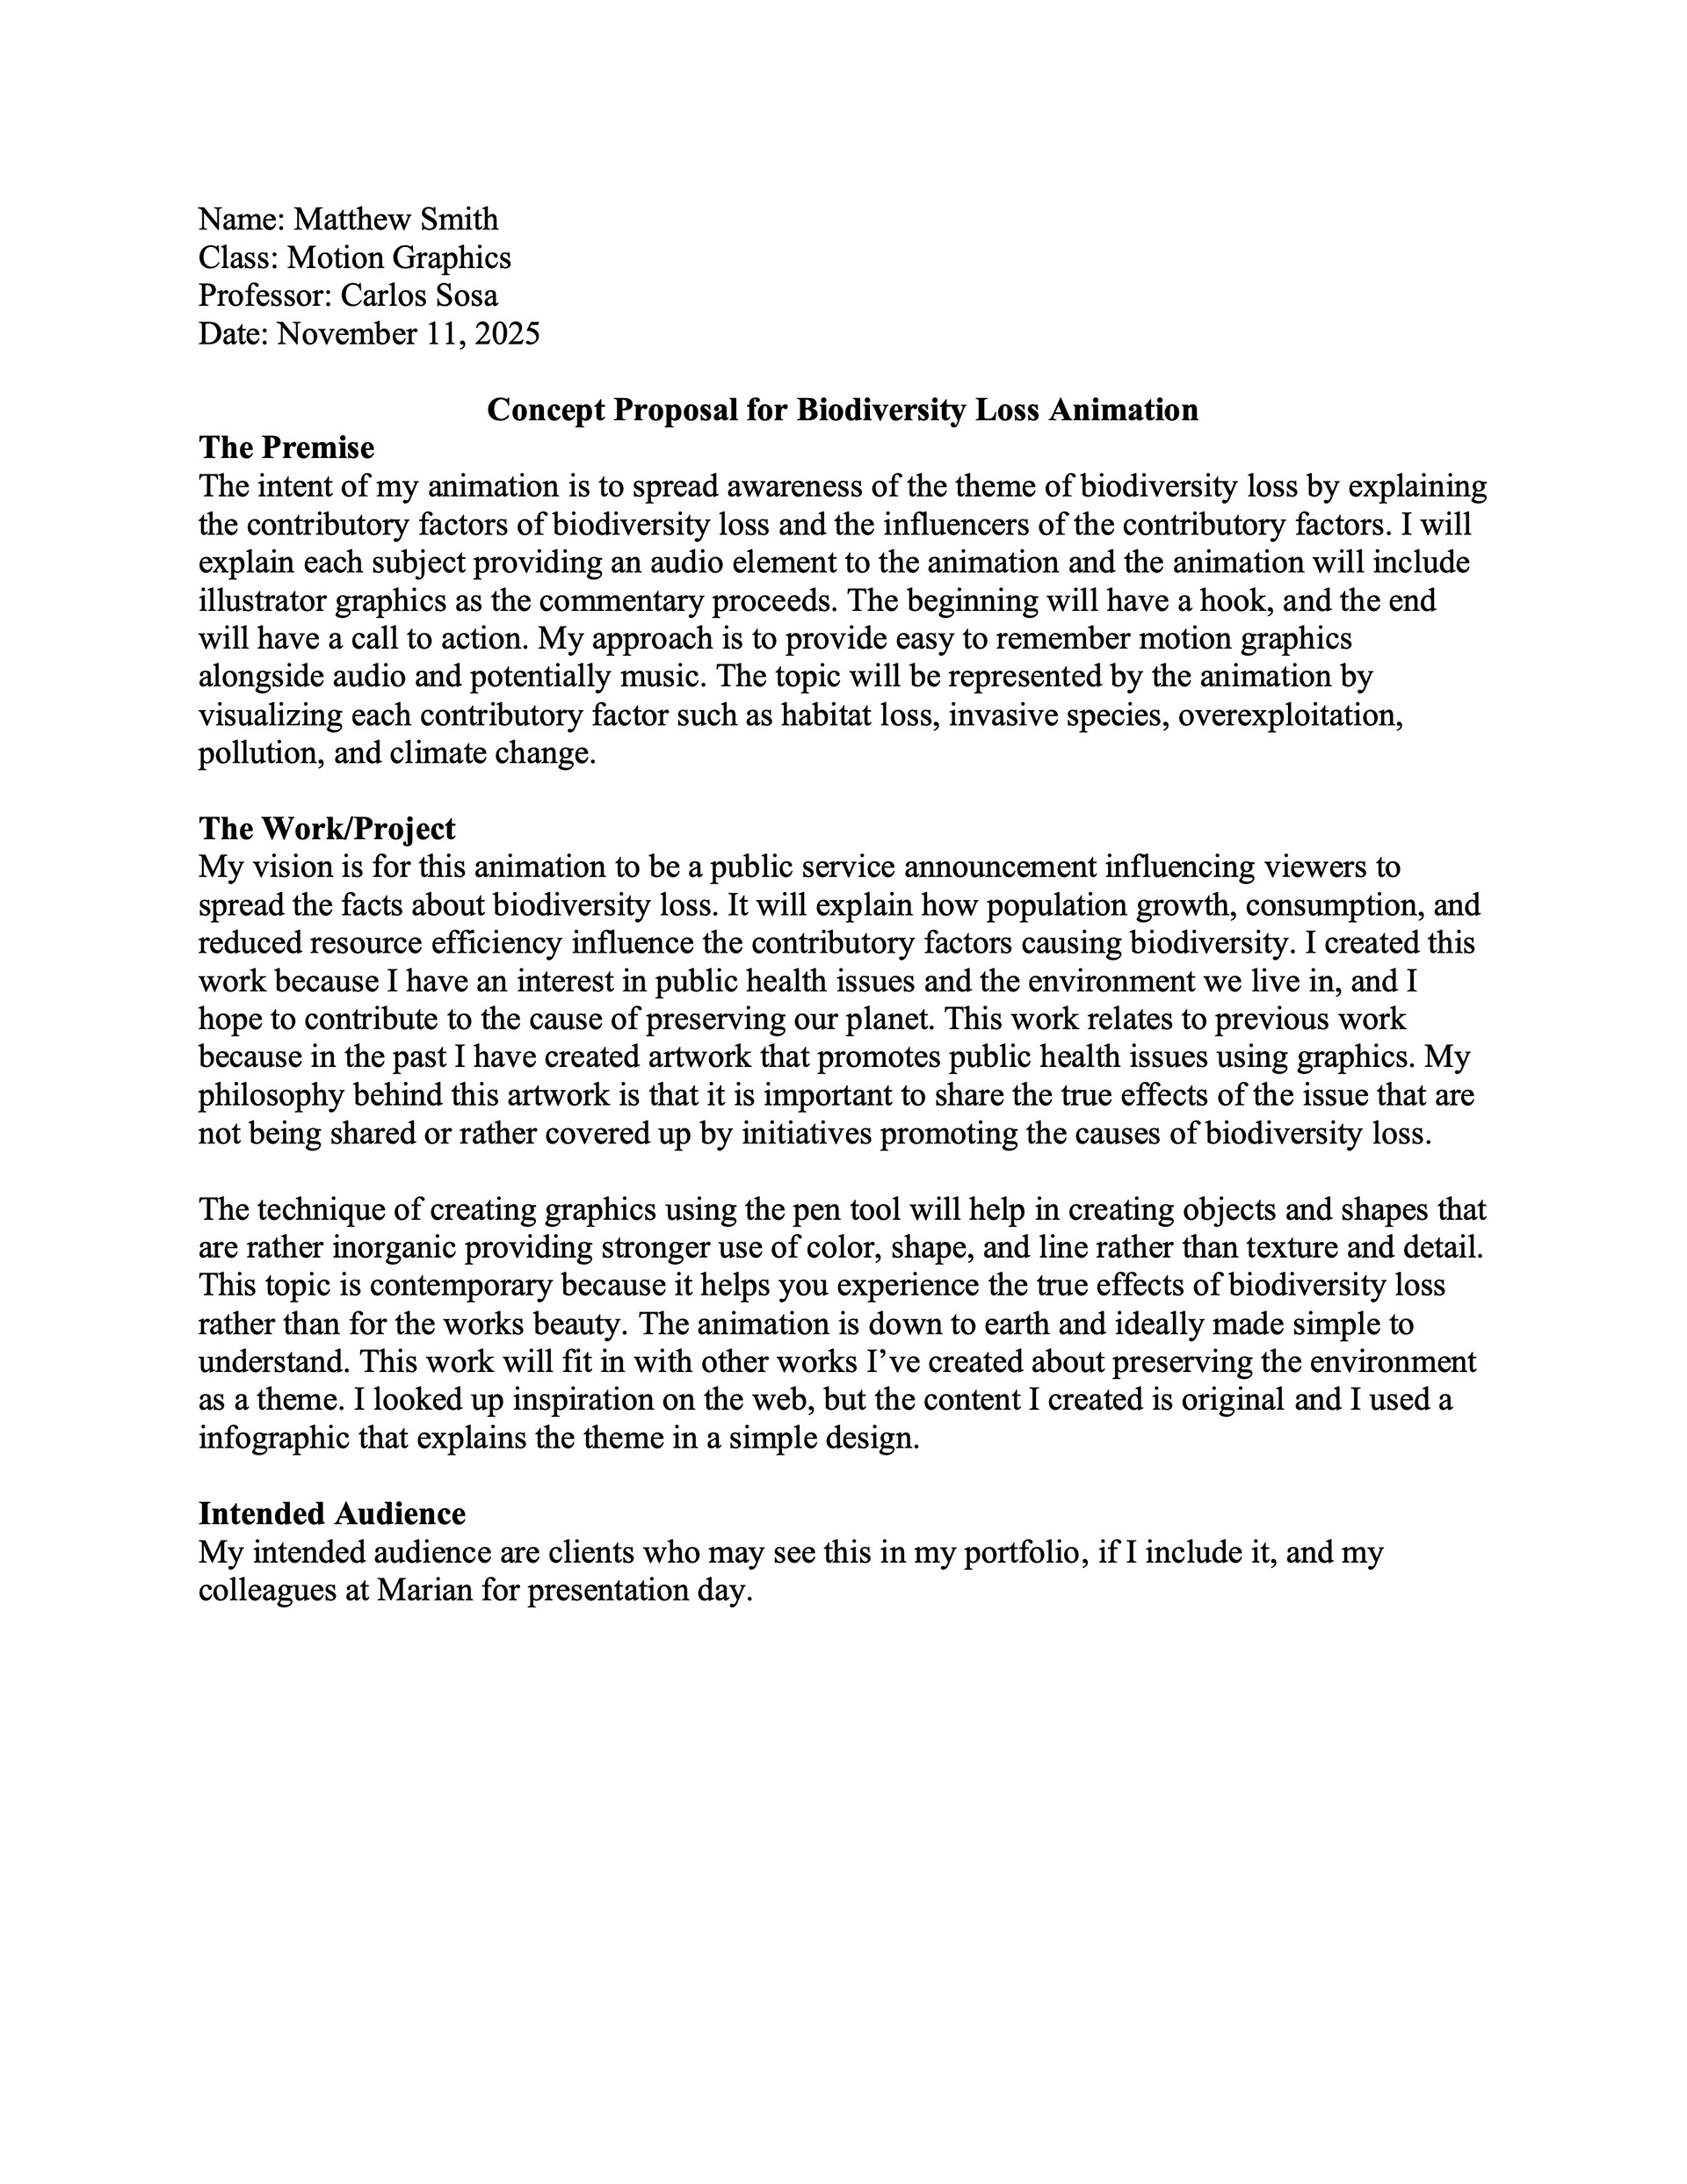
Once a problem is identified and a project defined, research helps provide the foundation for the project. For example, this may include first-hand experience participating in operations to broaden understanding and creative problem solving. If the project requires analytical research, the designer can improve their comprehension of the subject matter by creating a research outline, or preparing a concept proposal for the project, similar to the one below.
Concept Proposal Template
Concept Proposal Example
Step 2: Mood Boards and Inspiration
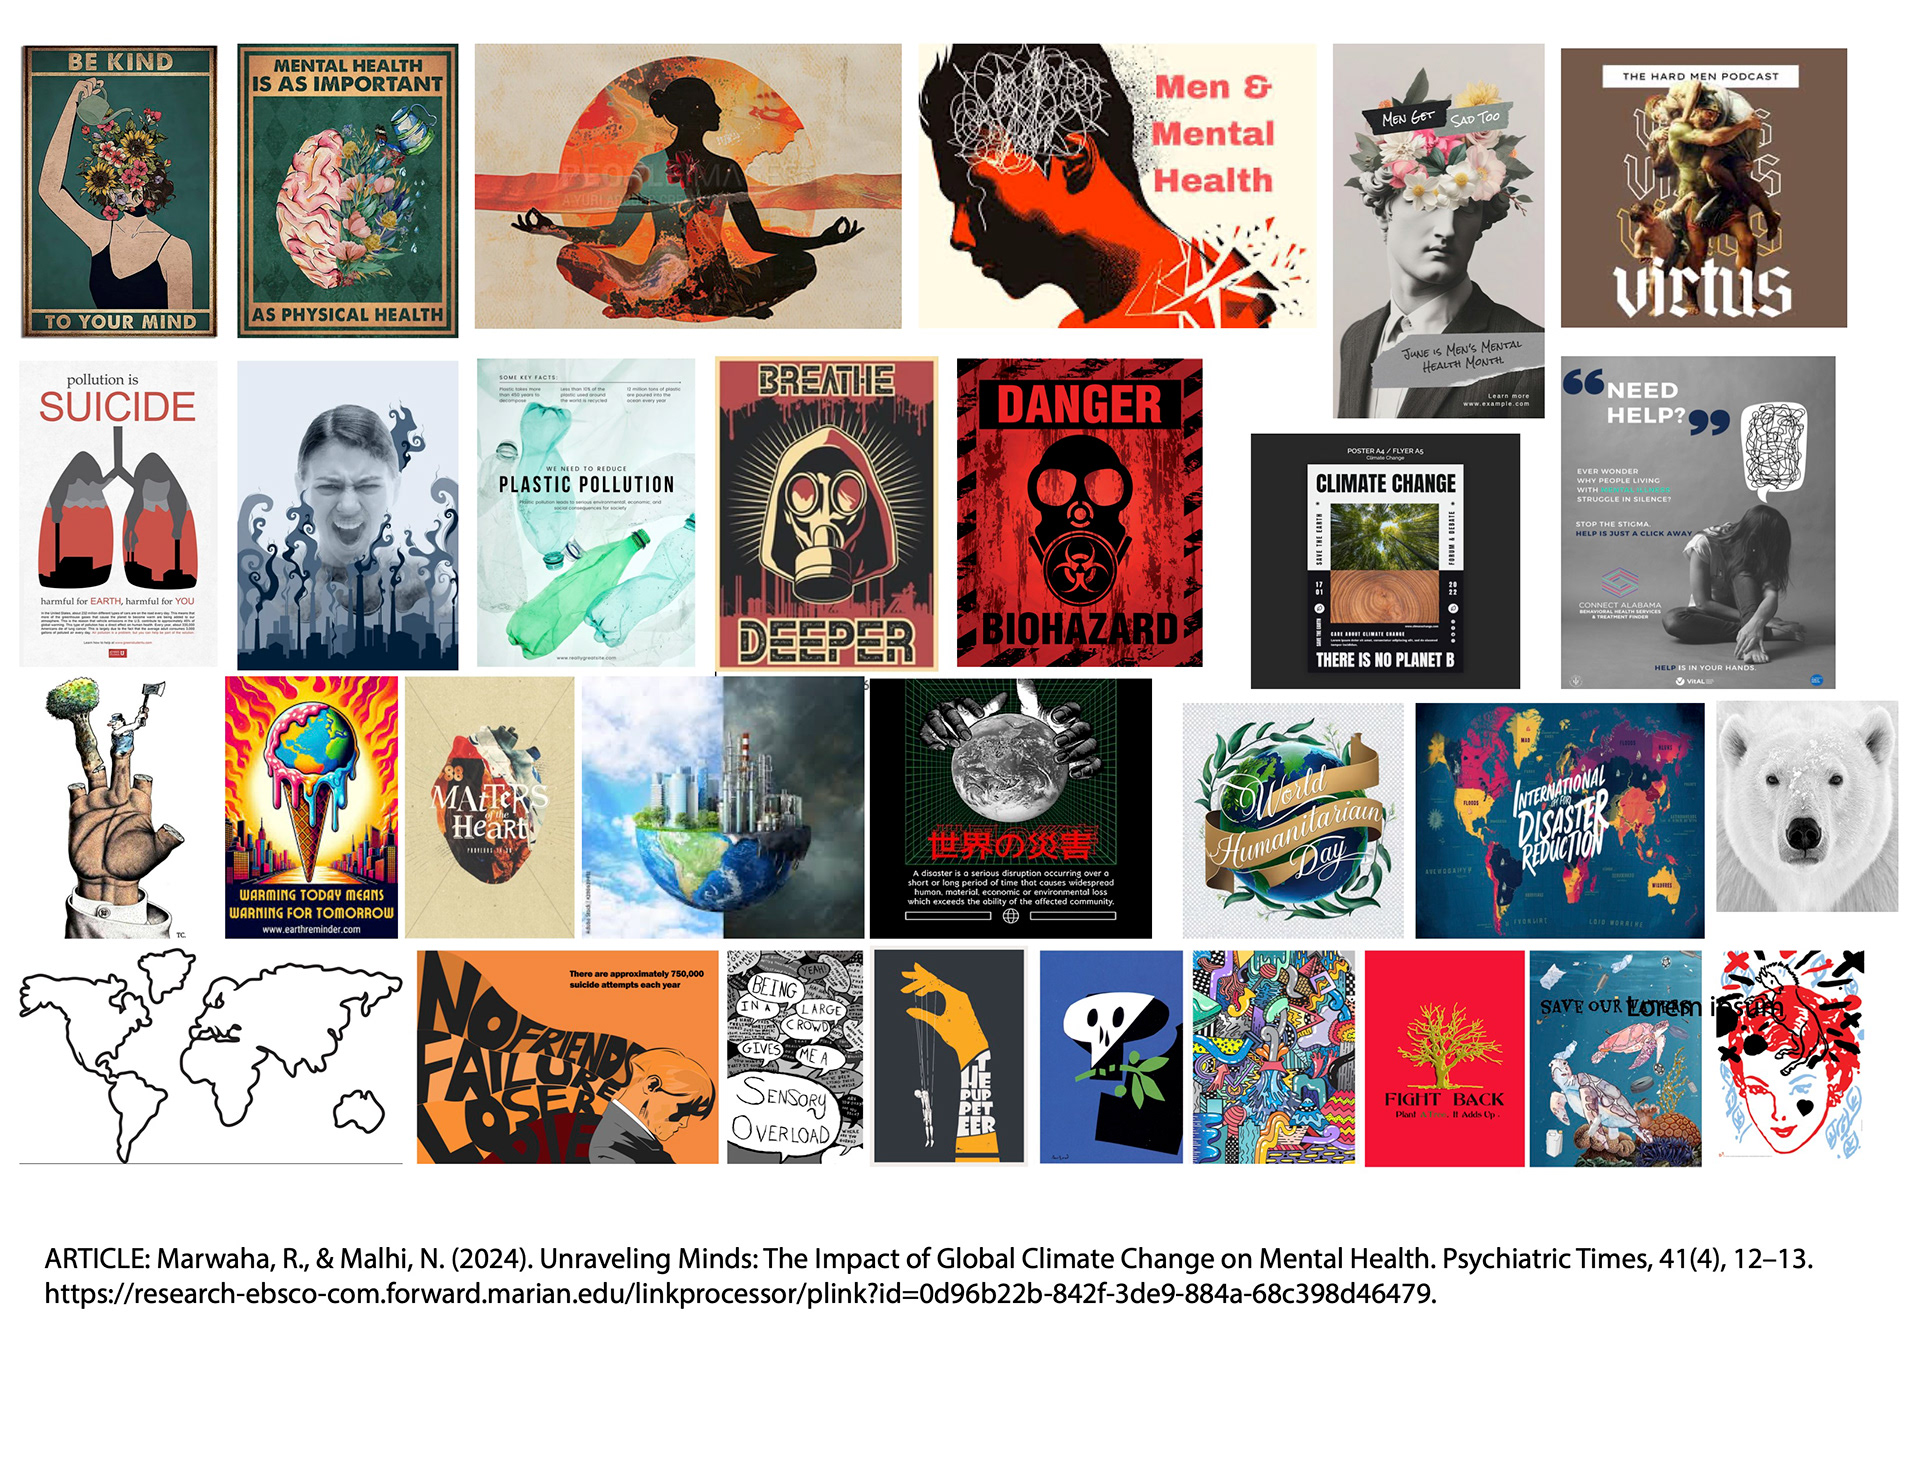
Following data collection criteria qualifying as research, the designer can now begin gathering inspiration. This can include physical materials such as cutouts from magazines or books, digital media found from web browsing or comments from YouTube videos, or actively engaging in the world such as interviewing or surveying a specific audience, taking photography, and more. The methods of gathering inspiration are limitless for the designer, but remembering these ideas when you need them most, can be challenging. Gathering inspiration is the strategy for recording ideas. This is where mood boards can play a crucial role in the design process. Mood boards collect inspiration combining any of these methods and improving concept development. Below is a basic example of a mood board from inspiration gathered from web browsing for my poster project on global warming.
Mood Board Example
Step 3: Thumbnail Sketches
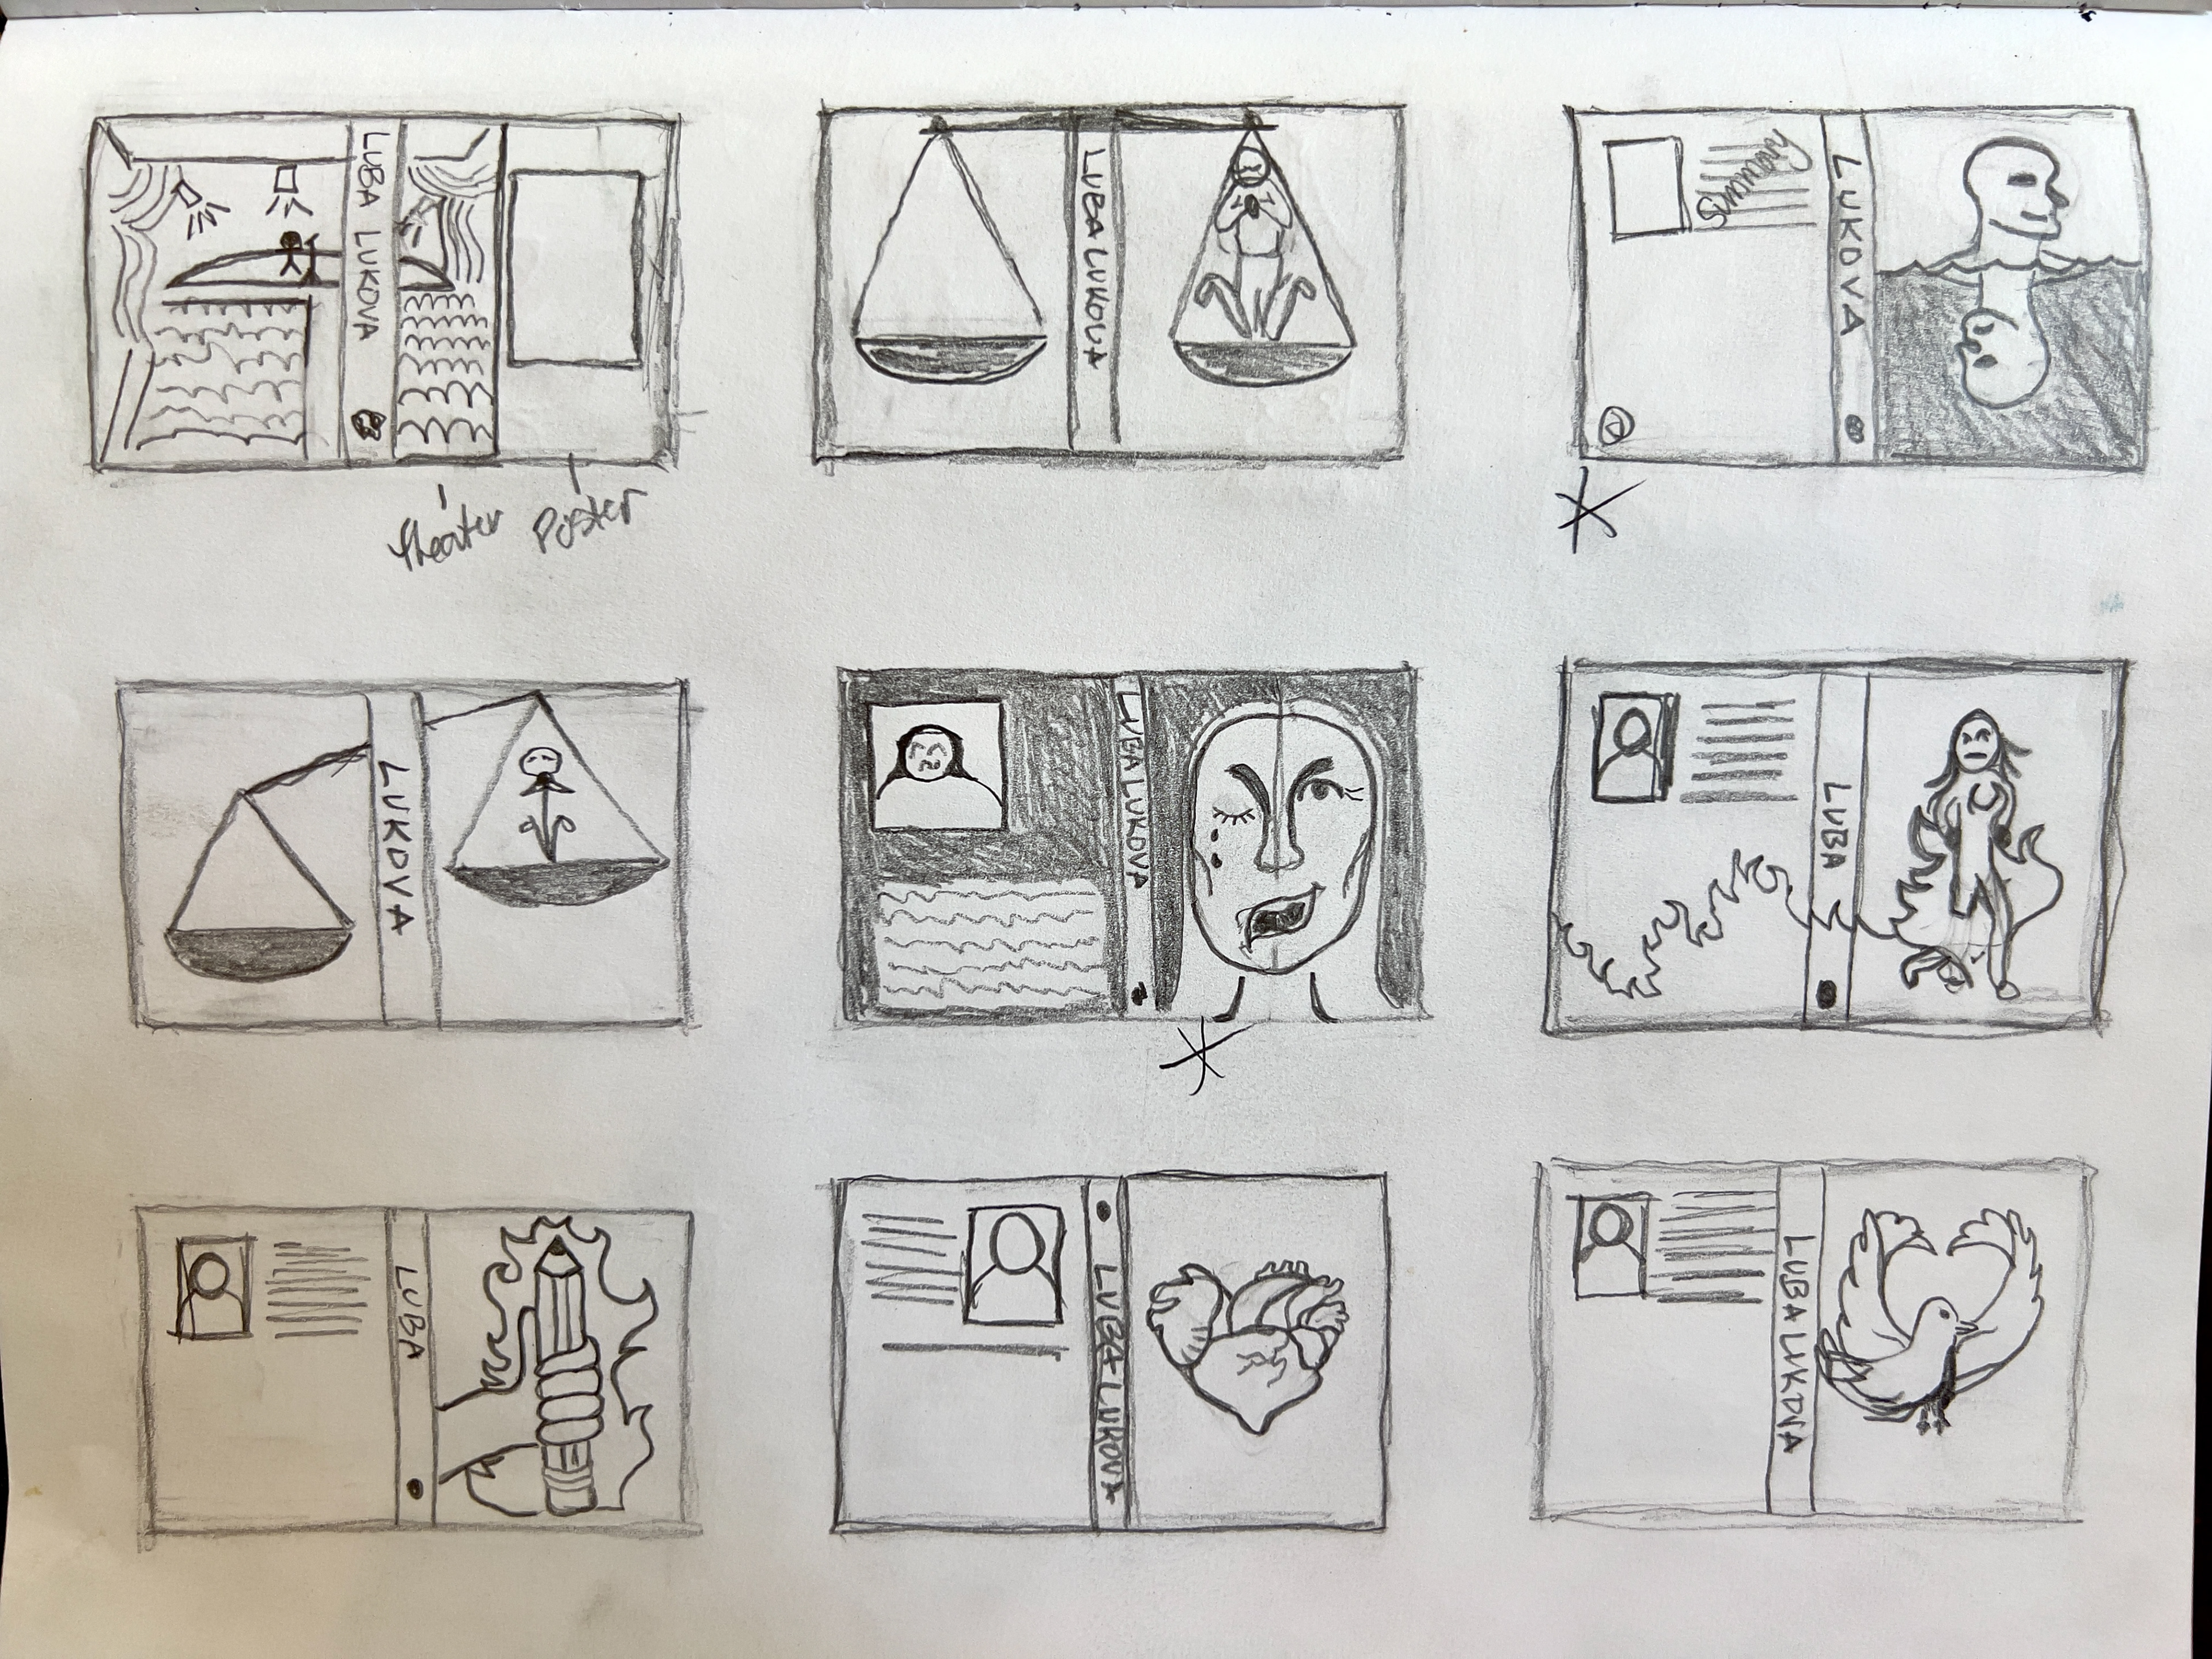
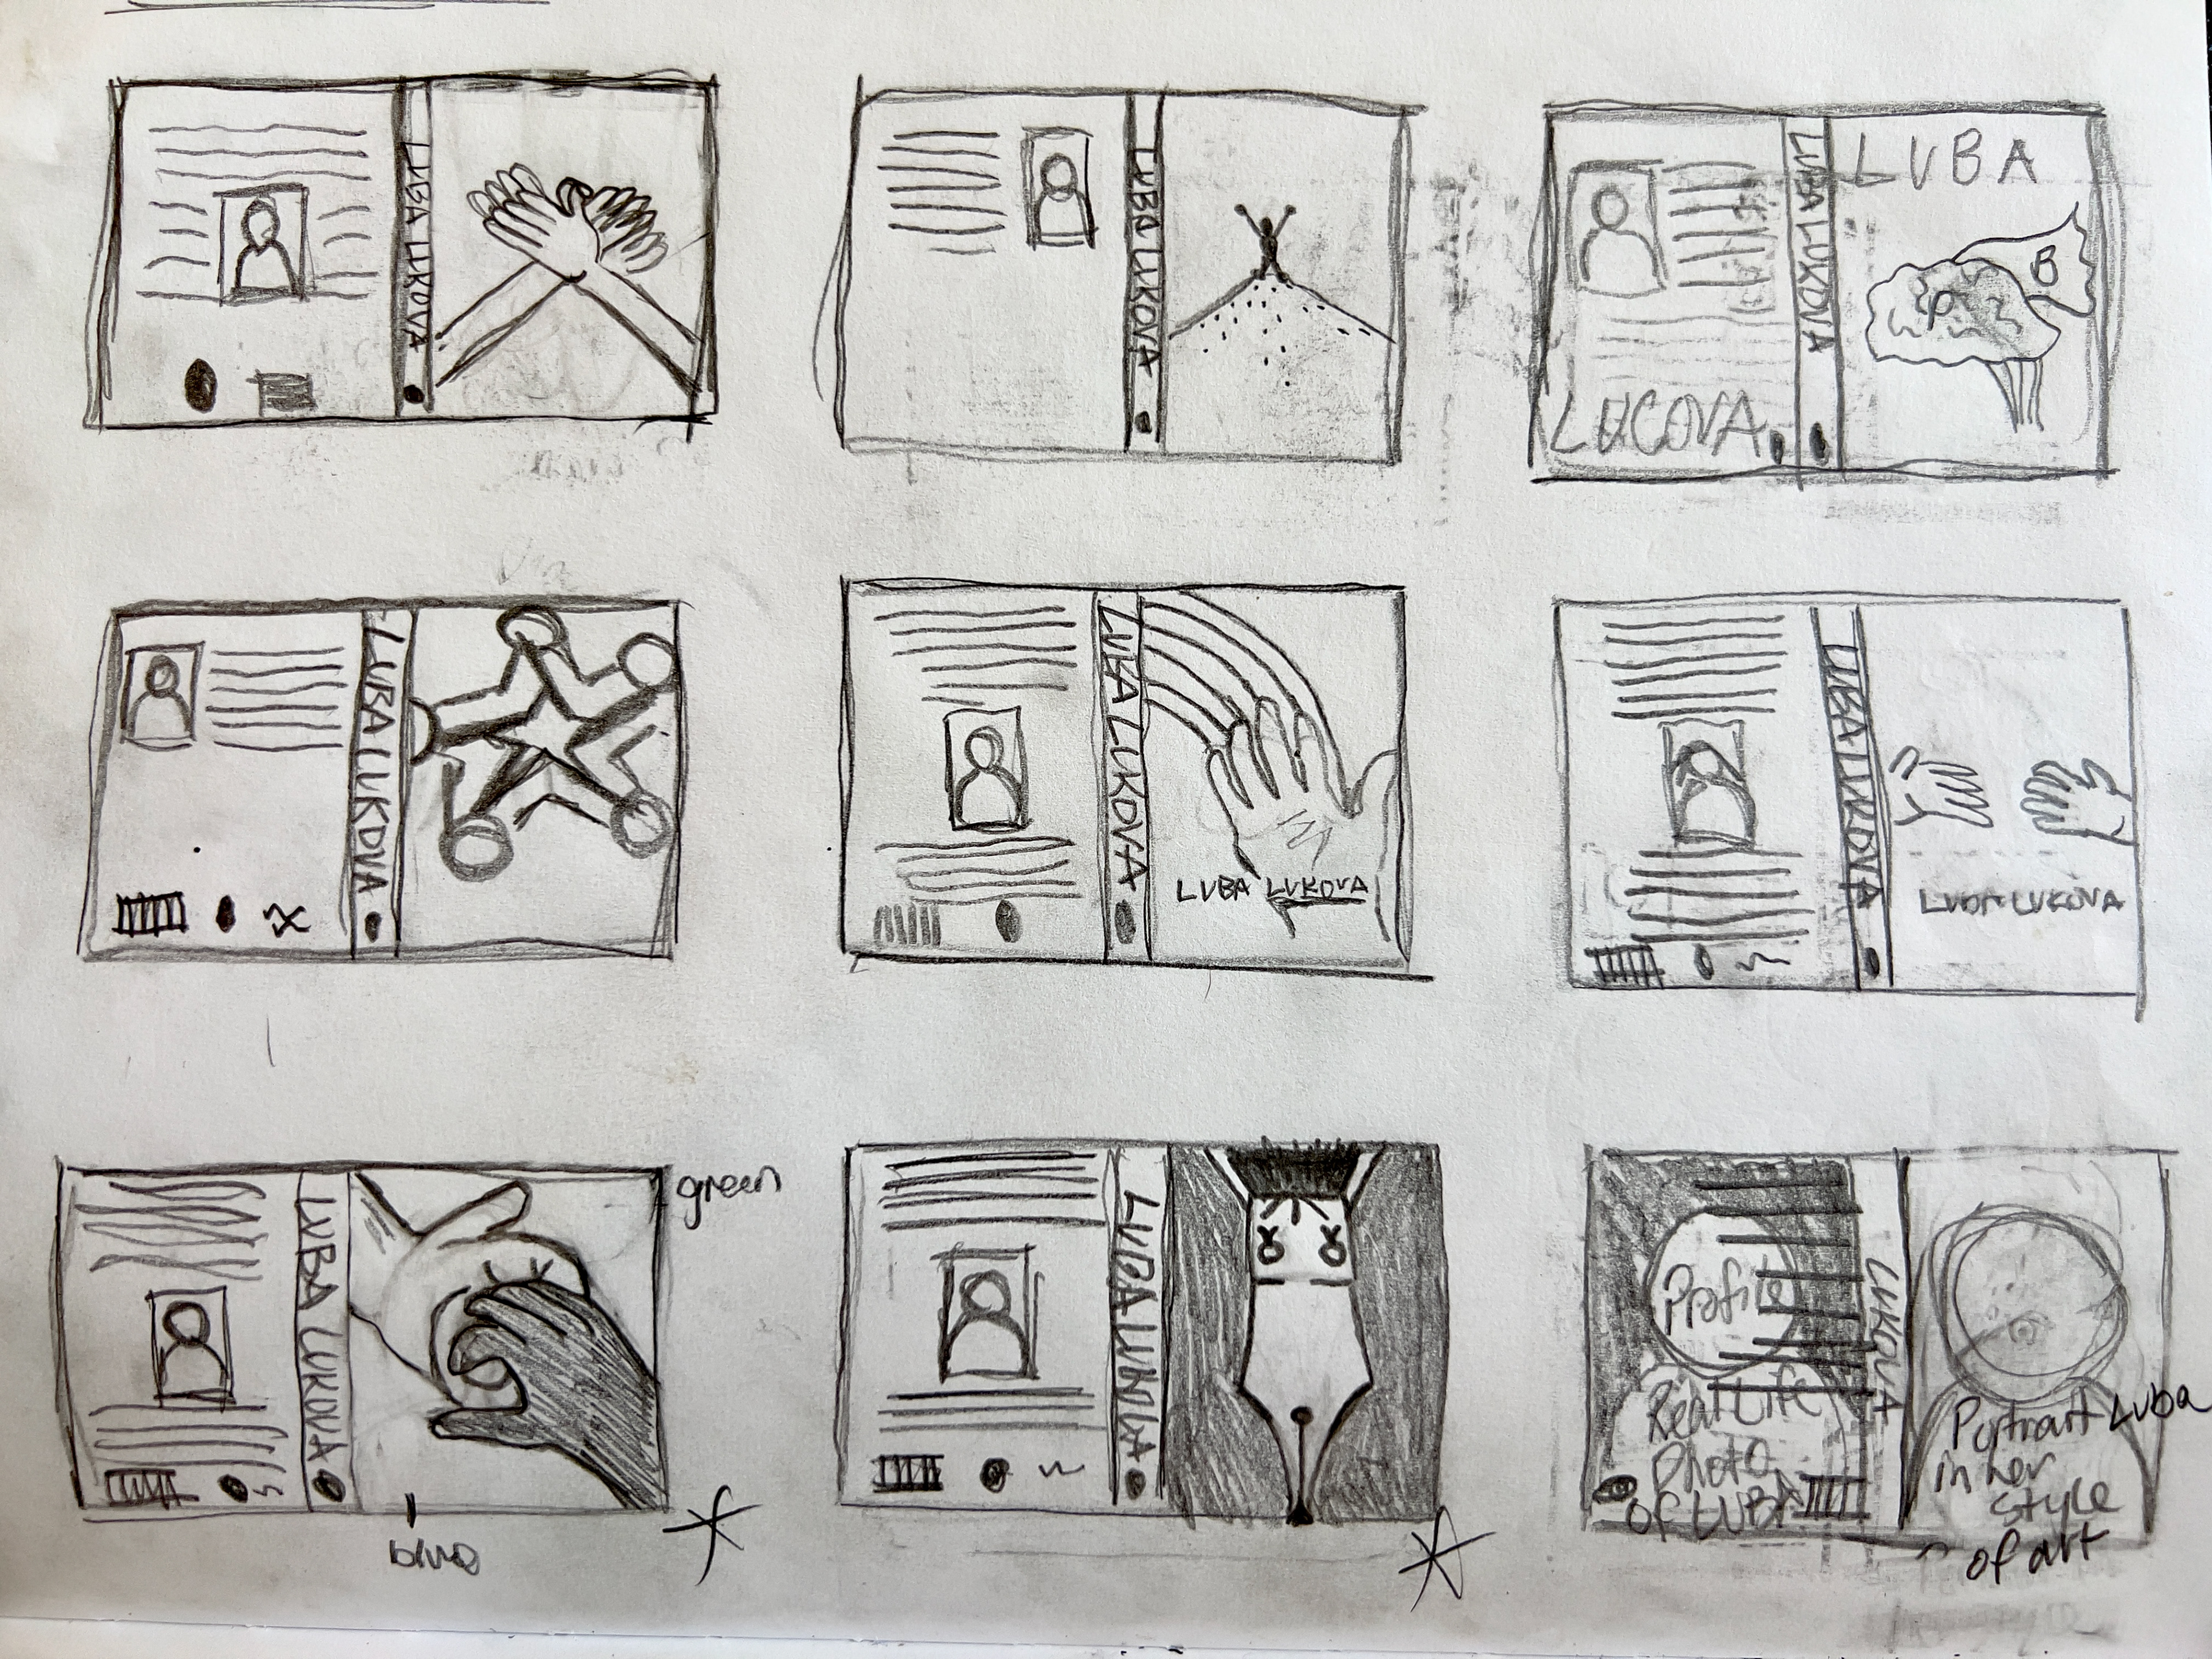
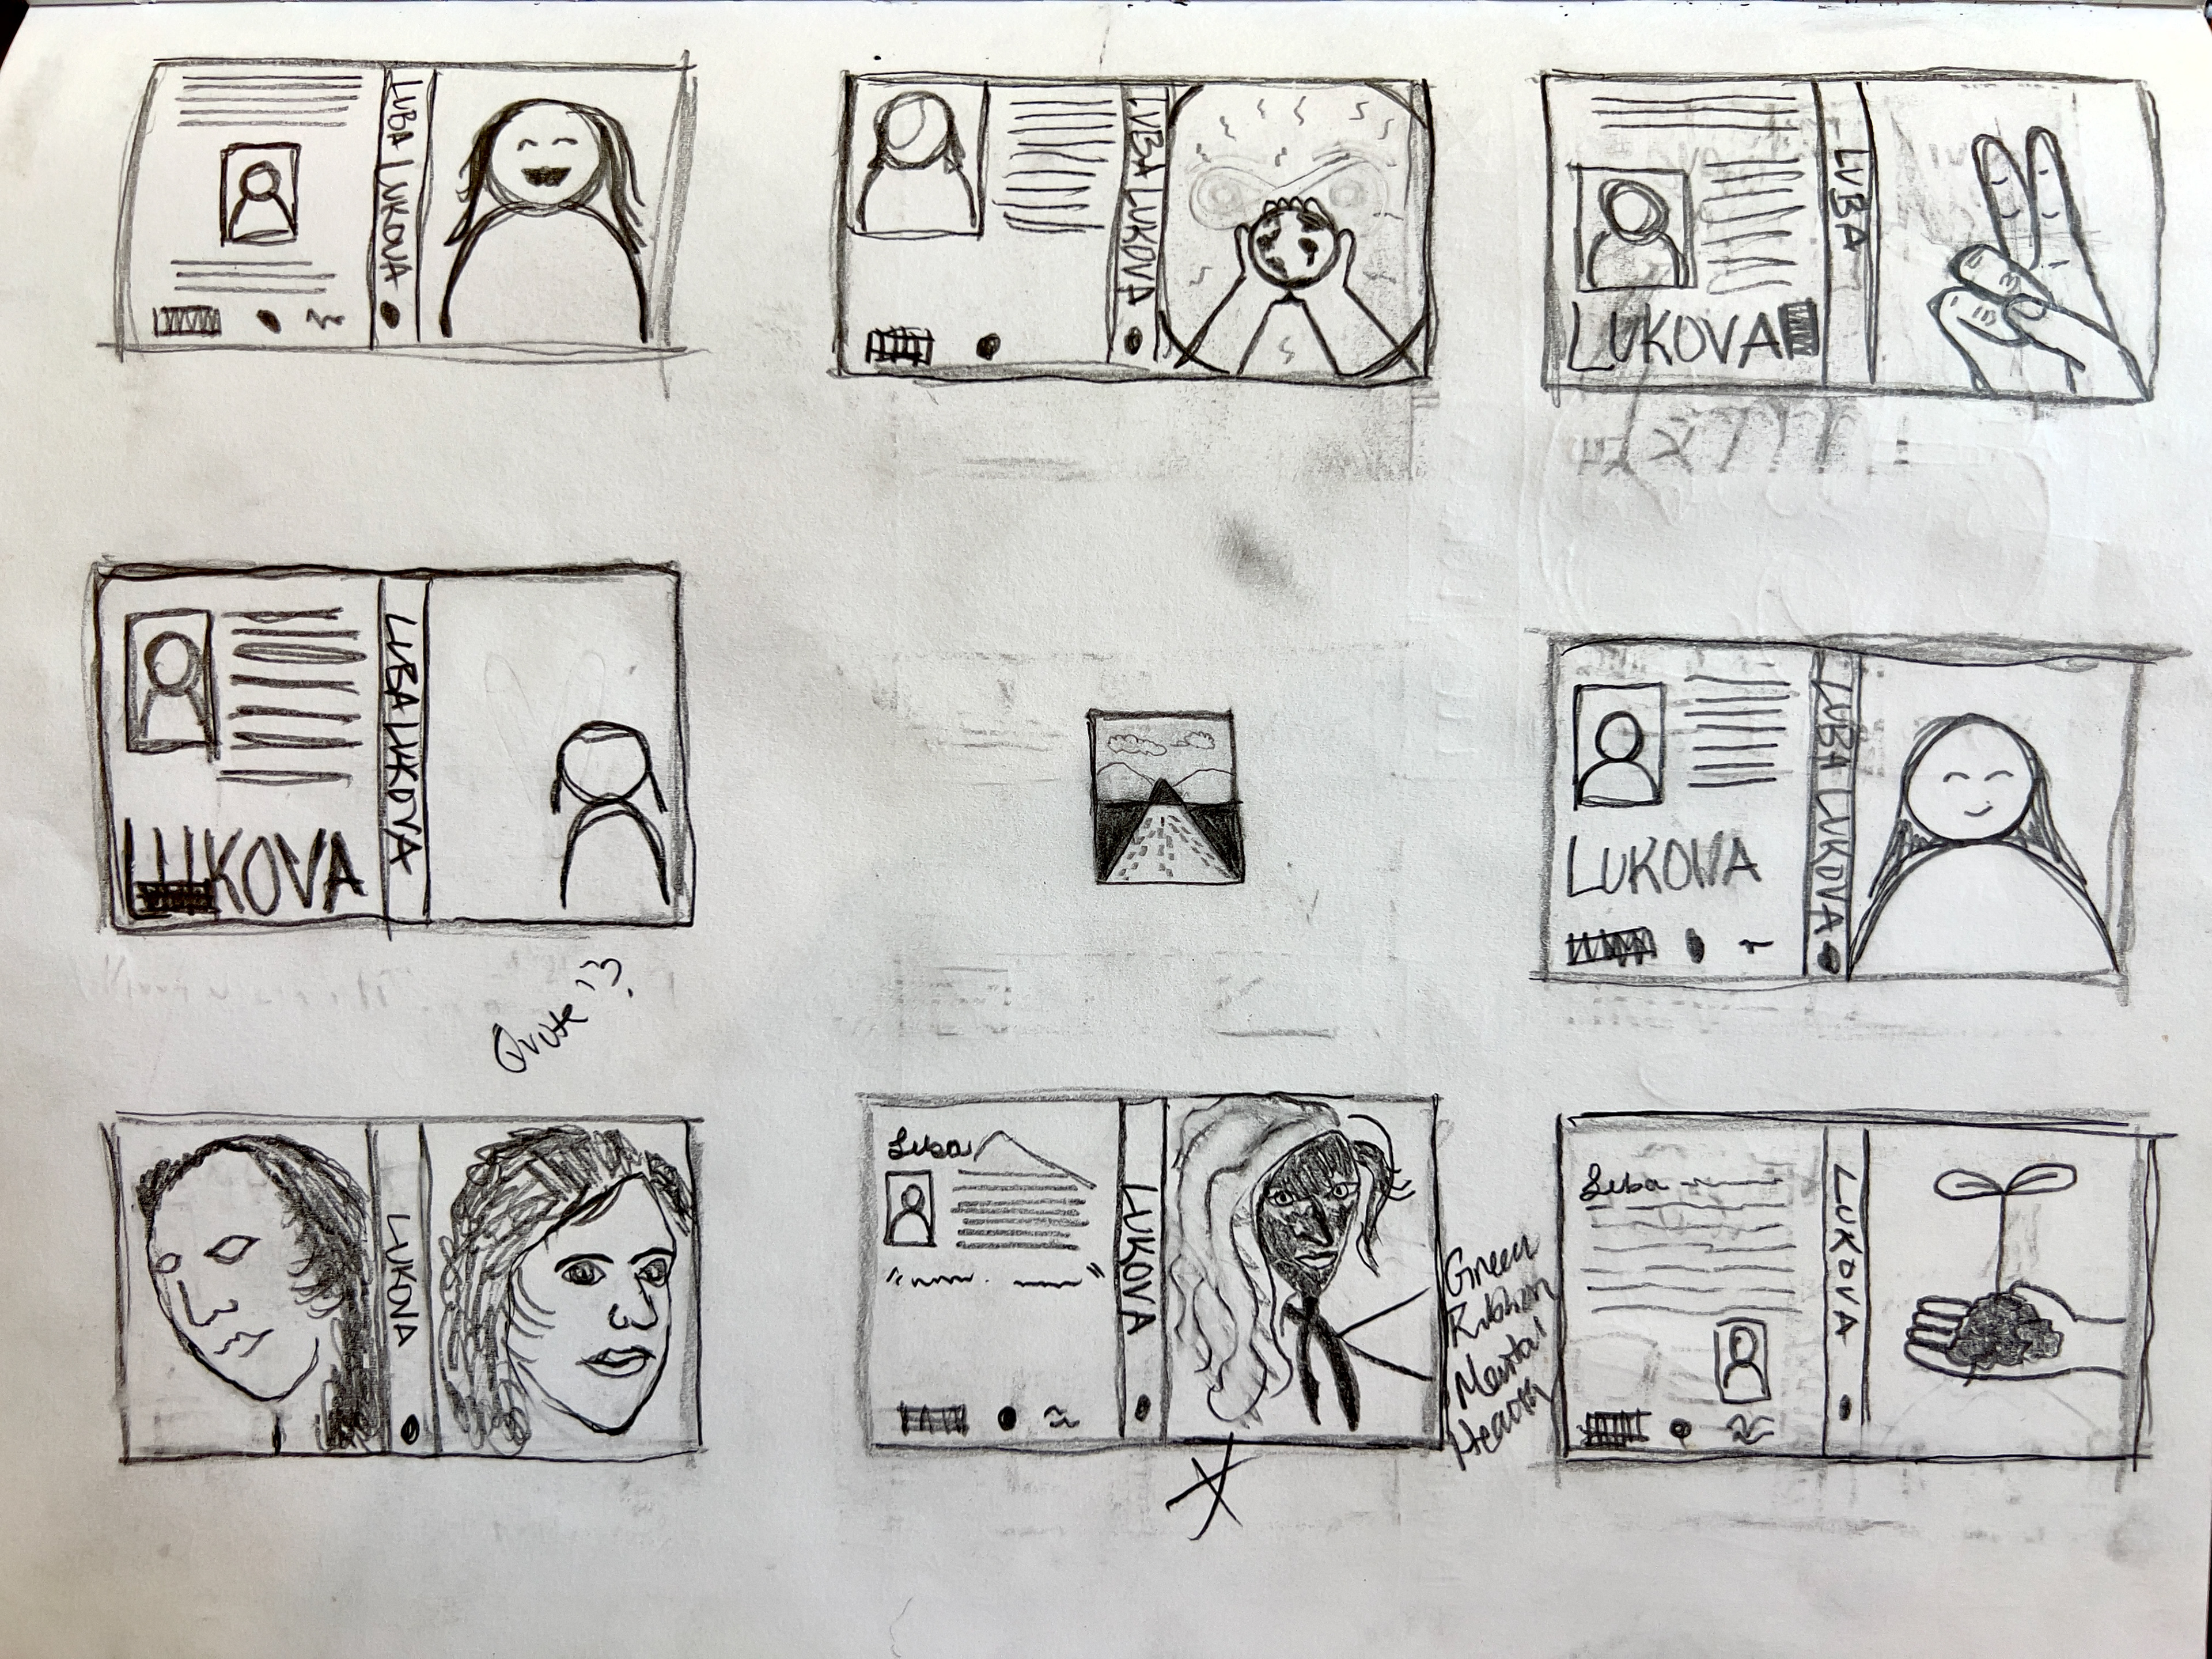
Once the designer feels confident they have enough materials, they can start creating simple sketches and refer to the mood board as a reference. My preference for creating thumbnails is old fashioned, pen or pencil on a grid or bright white sketchbook. The idea here is to transition from real world examples, to the development of your own, unique creation. It is obviously an abomination to copy and paste from your mood board, but like all other creative arts, your work develops from previous contributions in the industry. Thumbnail sketches are small sketches perfect for comparing and contrasting which of your creative solutions is the most effective. Below are examples of thumbnail sketches, which in turn, lead to the next step of the design process, the rough drafts.
Thumbnail Sketch Examples
Step 4: Rough Drafts
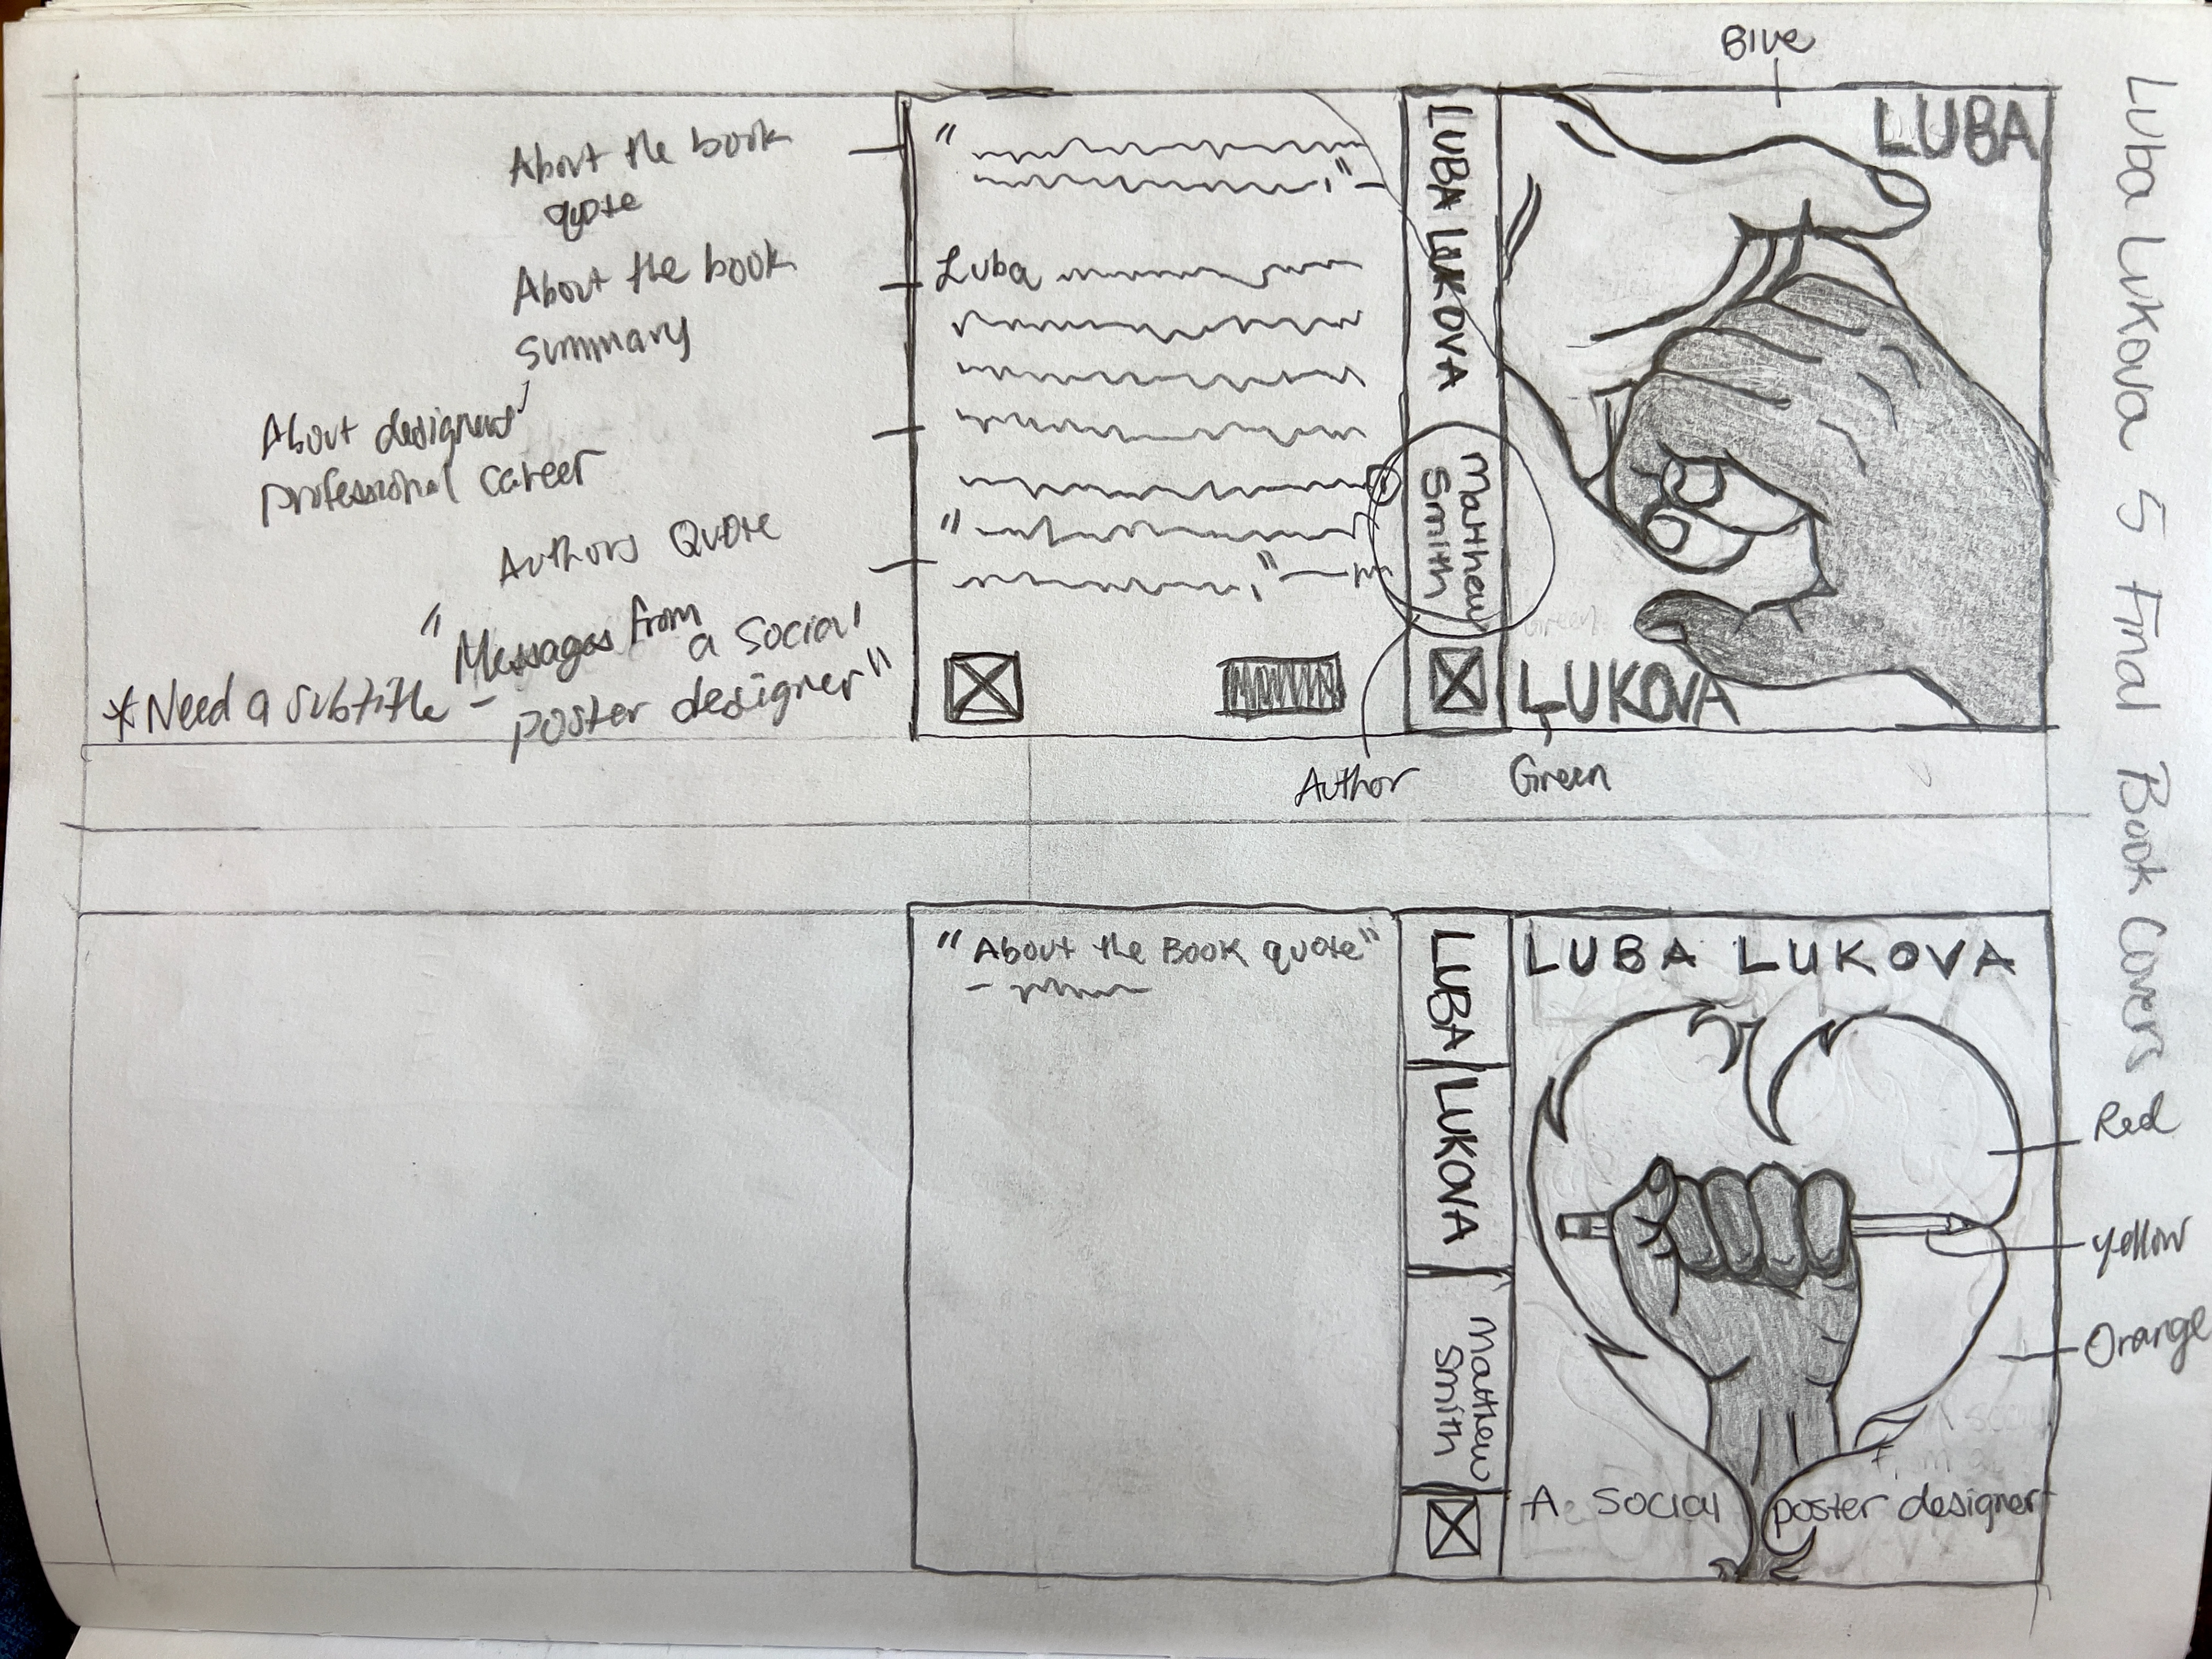
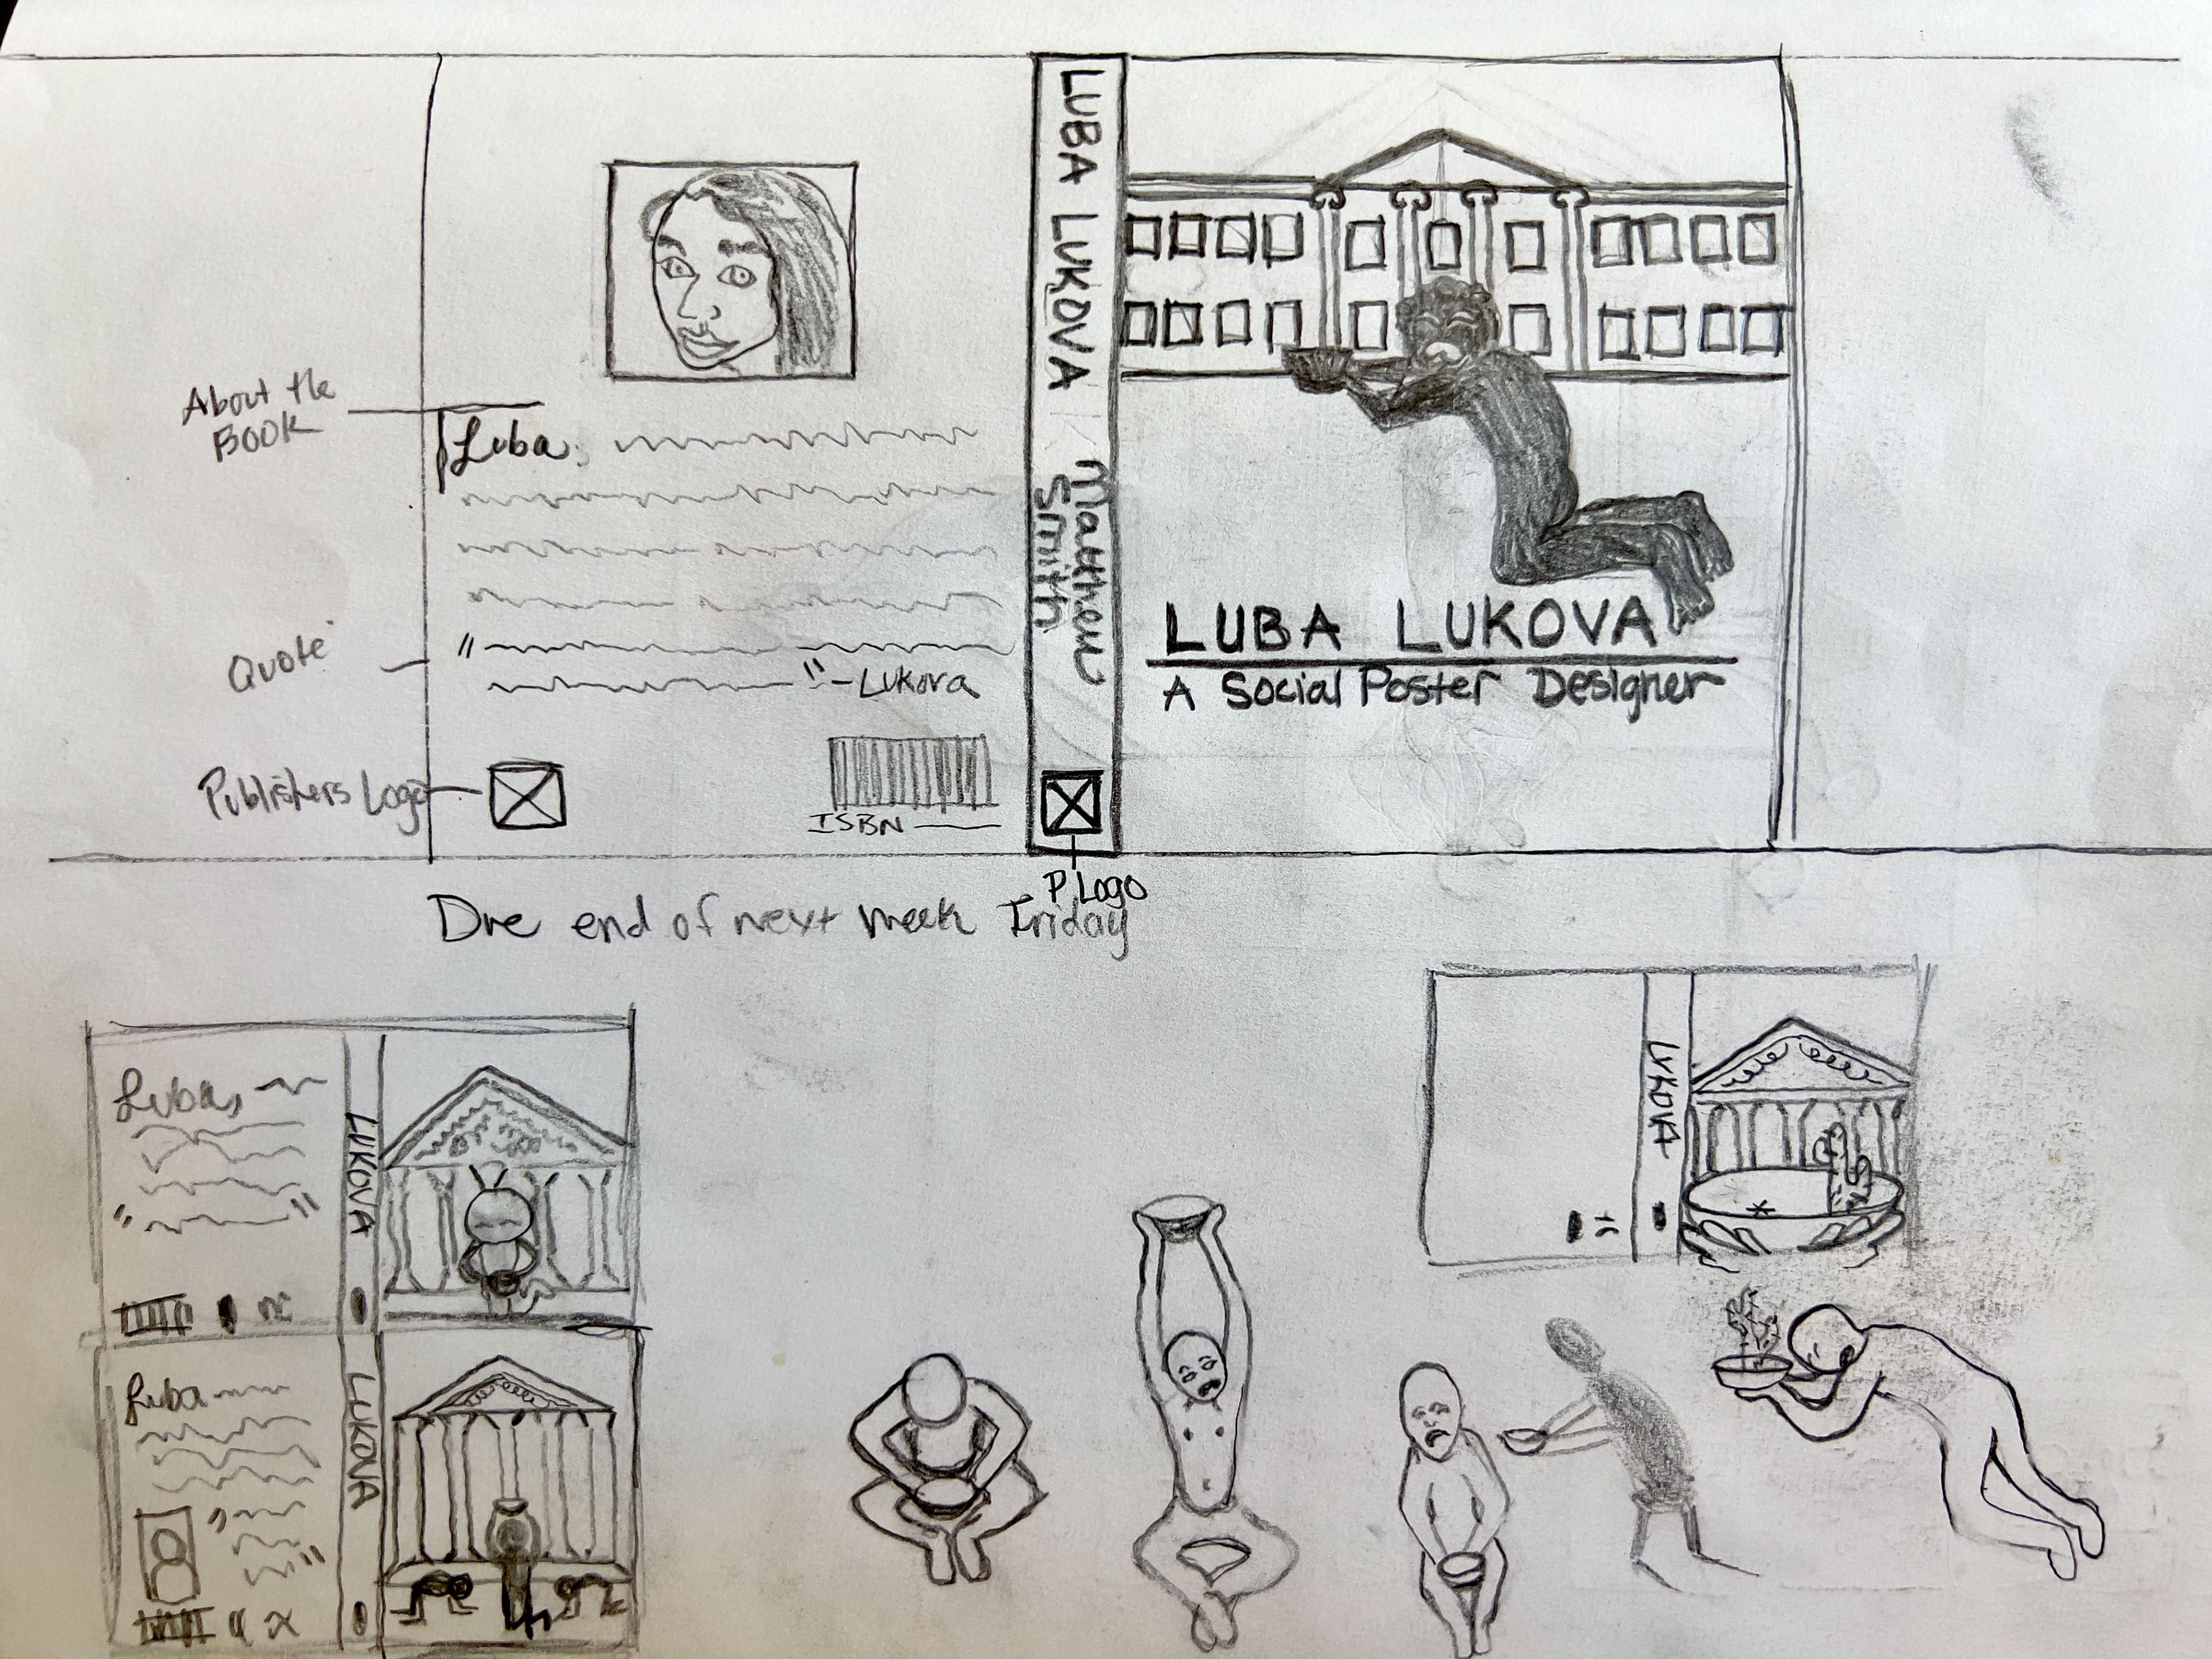
After completing thumbnails or small sketches, the designer will take their best ideas and expand upon them. Deciding on a few thumbnails, and enlarging them to a half page helps the designer consider alternatives while frequently shining light on certain drafts over others. The purpose is to push your creative solutions to be more effective by enhancing the most visually compelling design. Rough drafts should ideally transition from idea generation to idea refinement by improving layout and functionality.
Rough Draft Examples
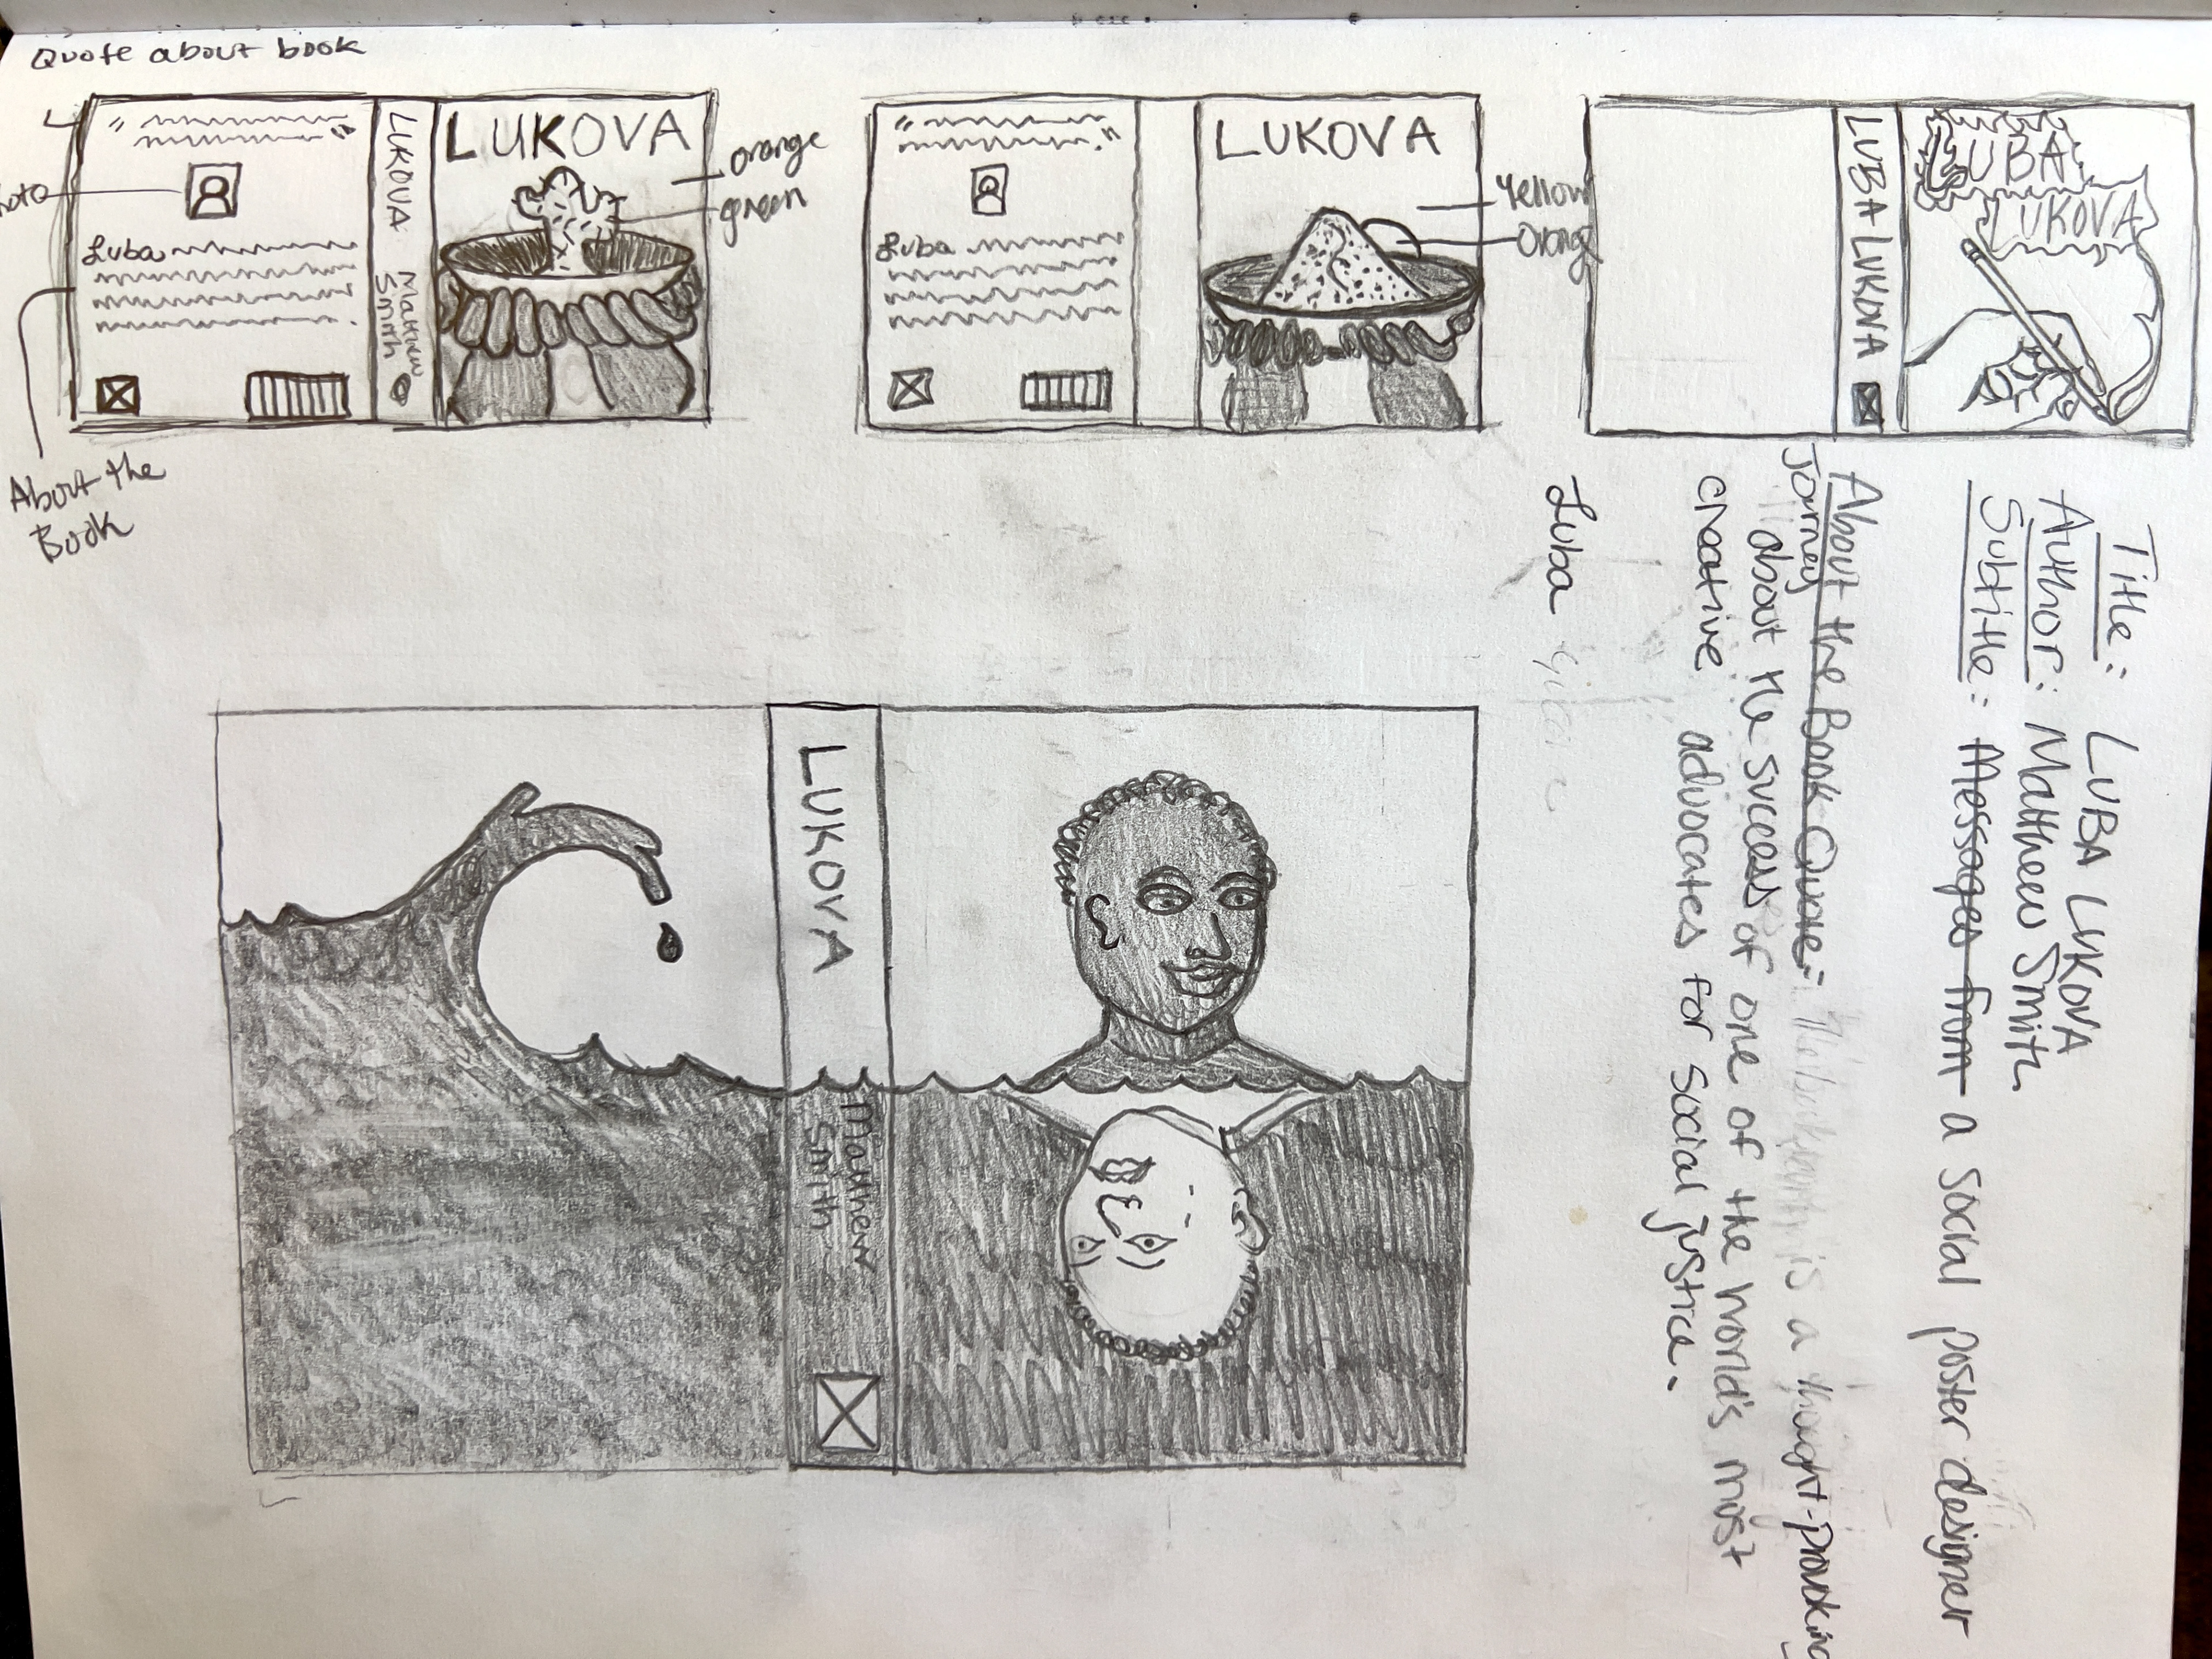
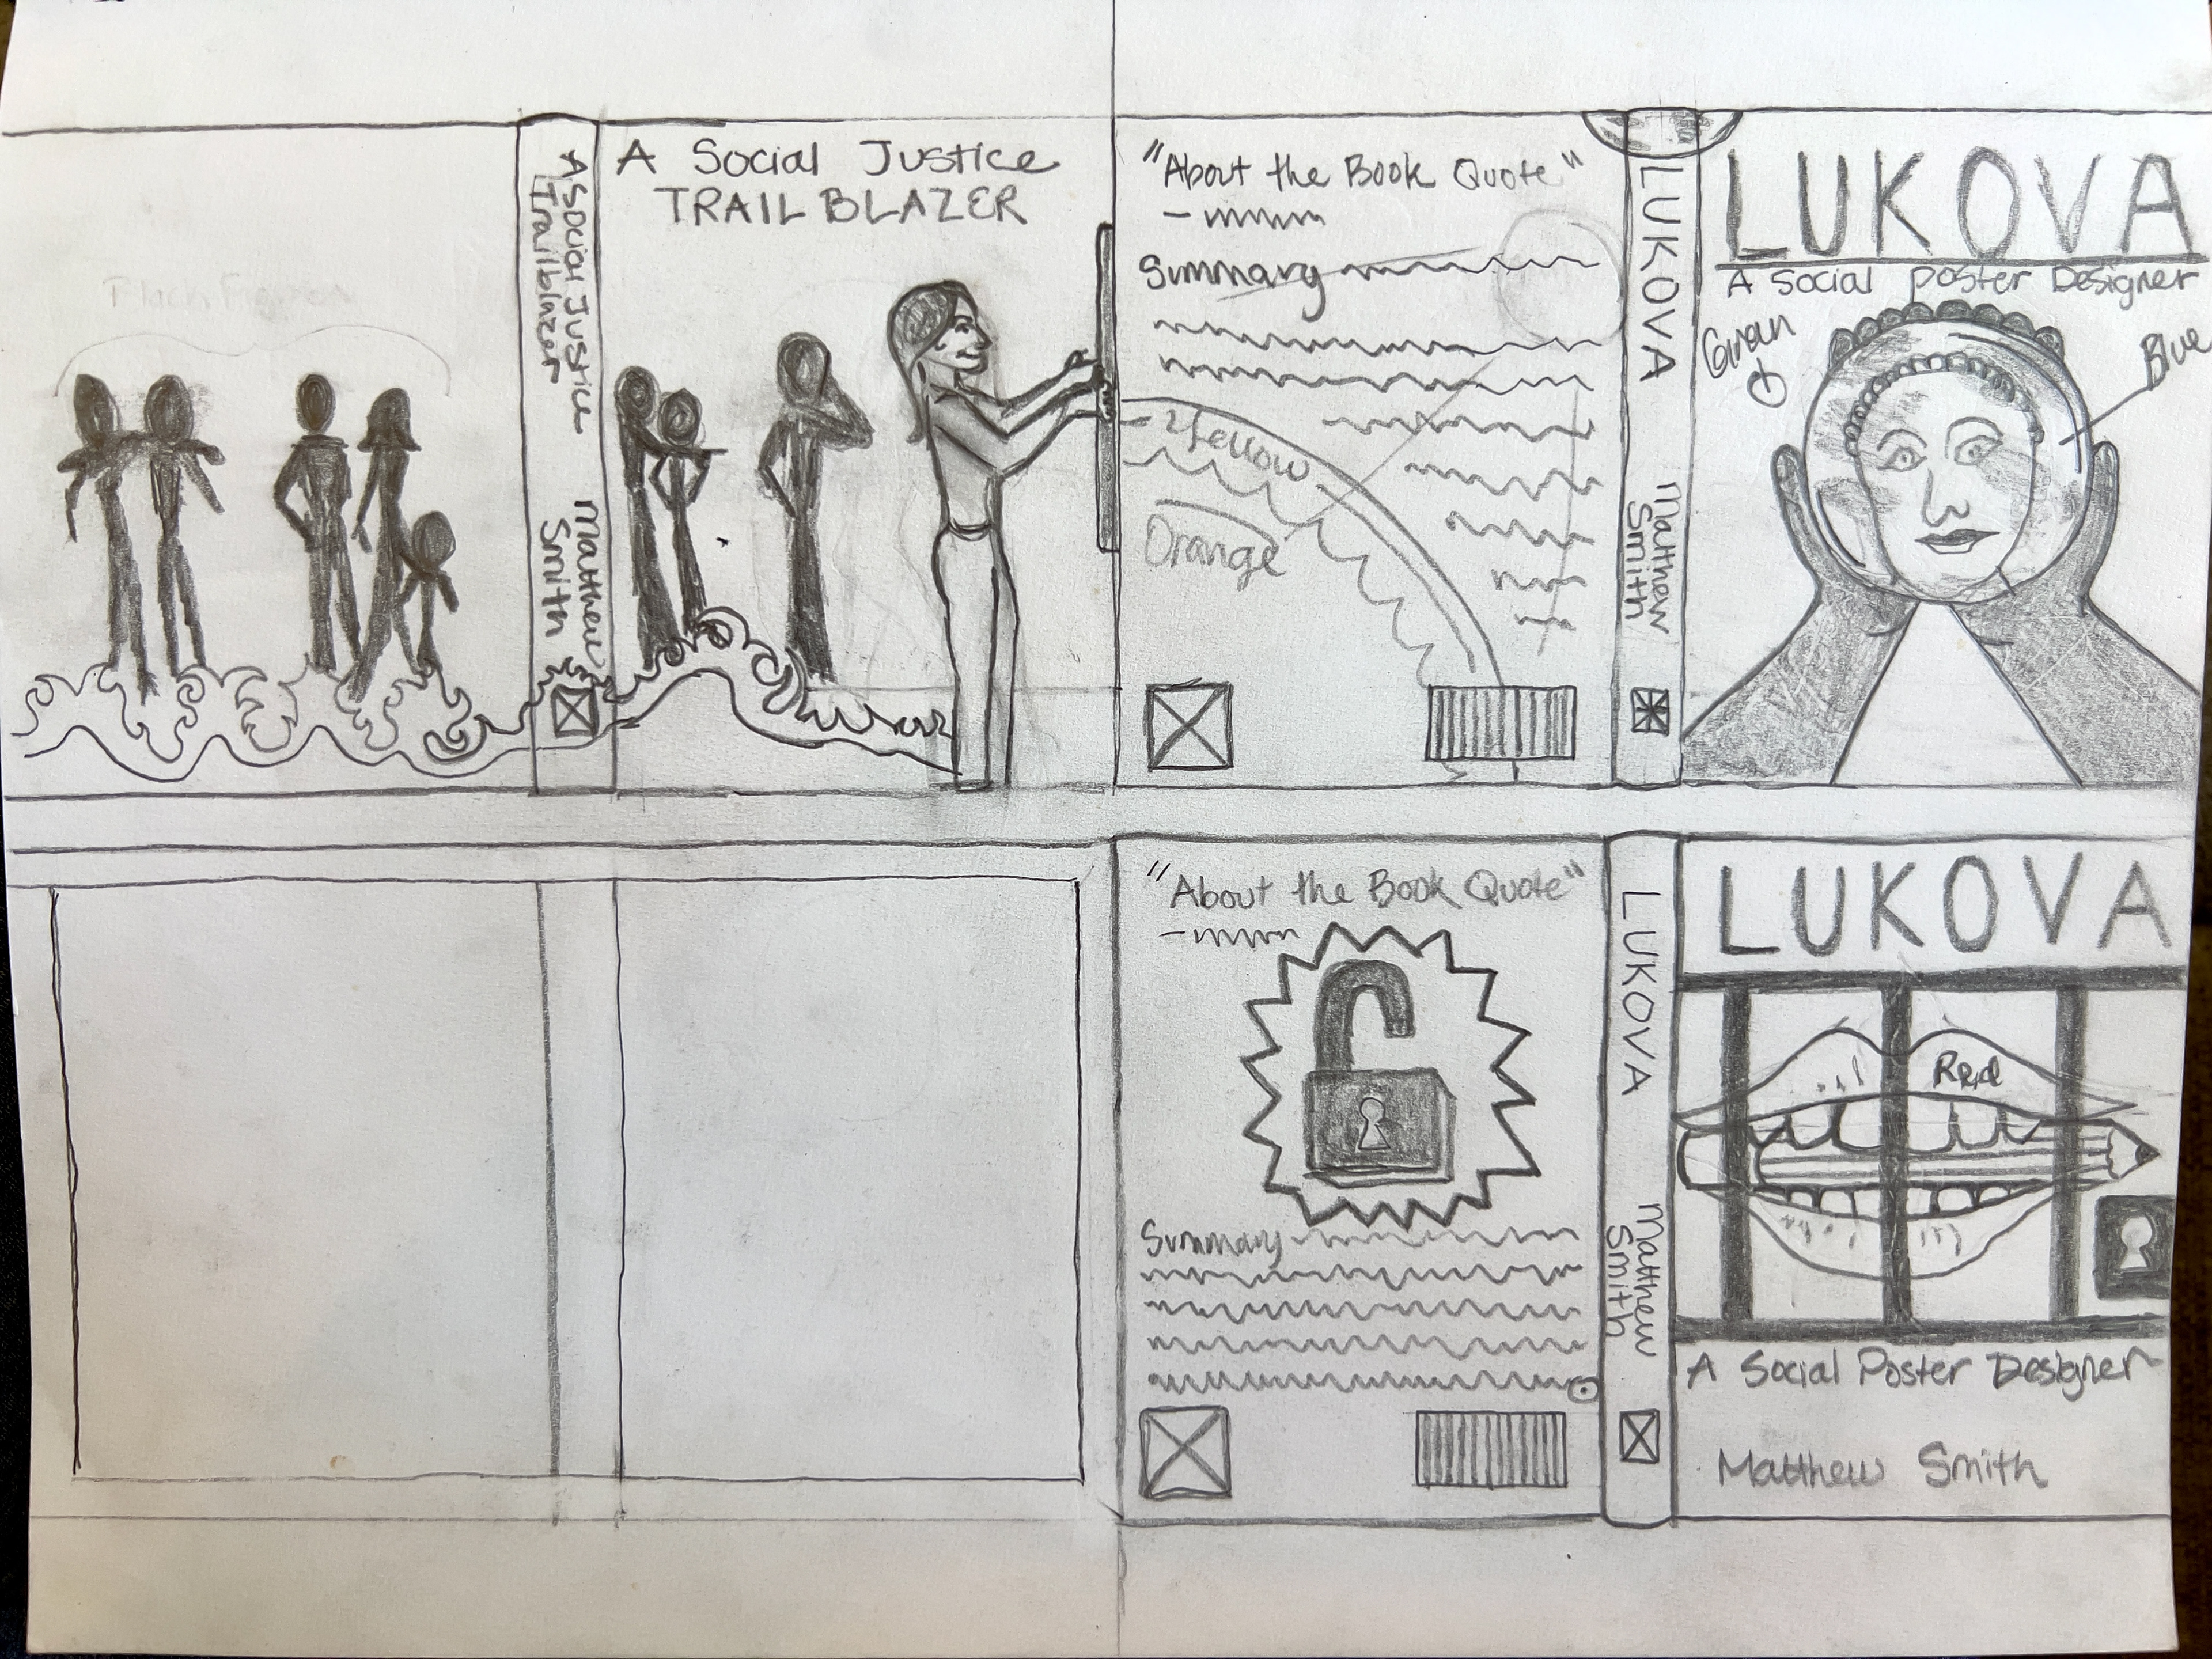
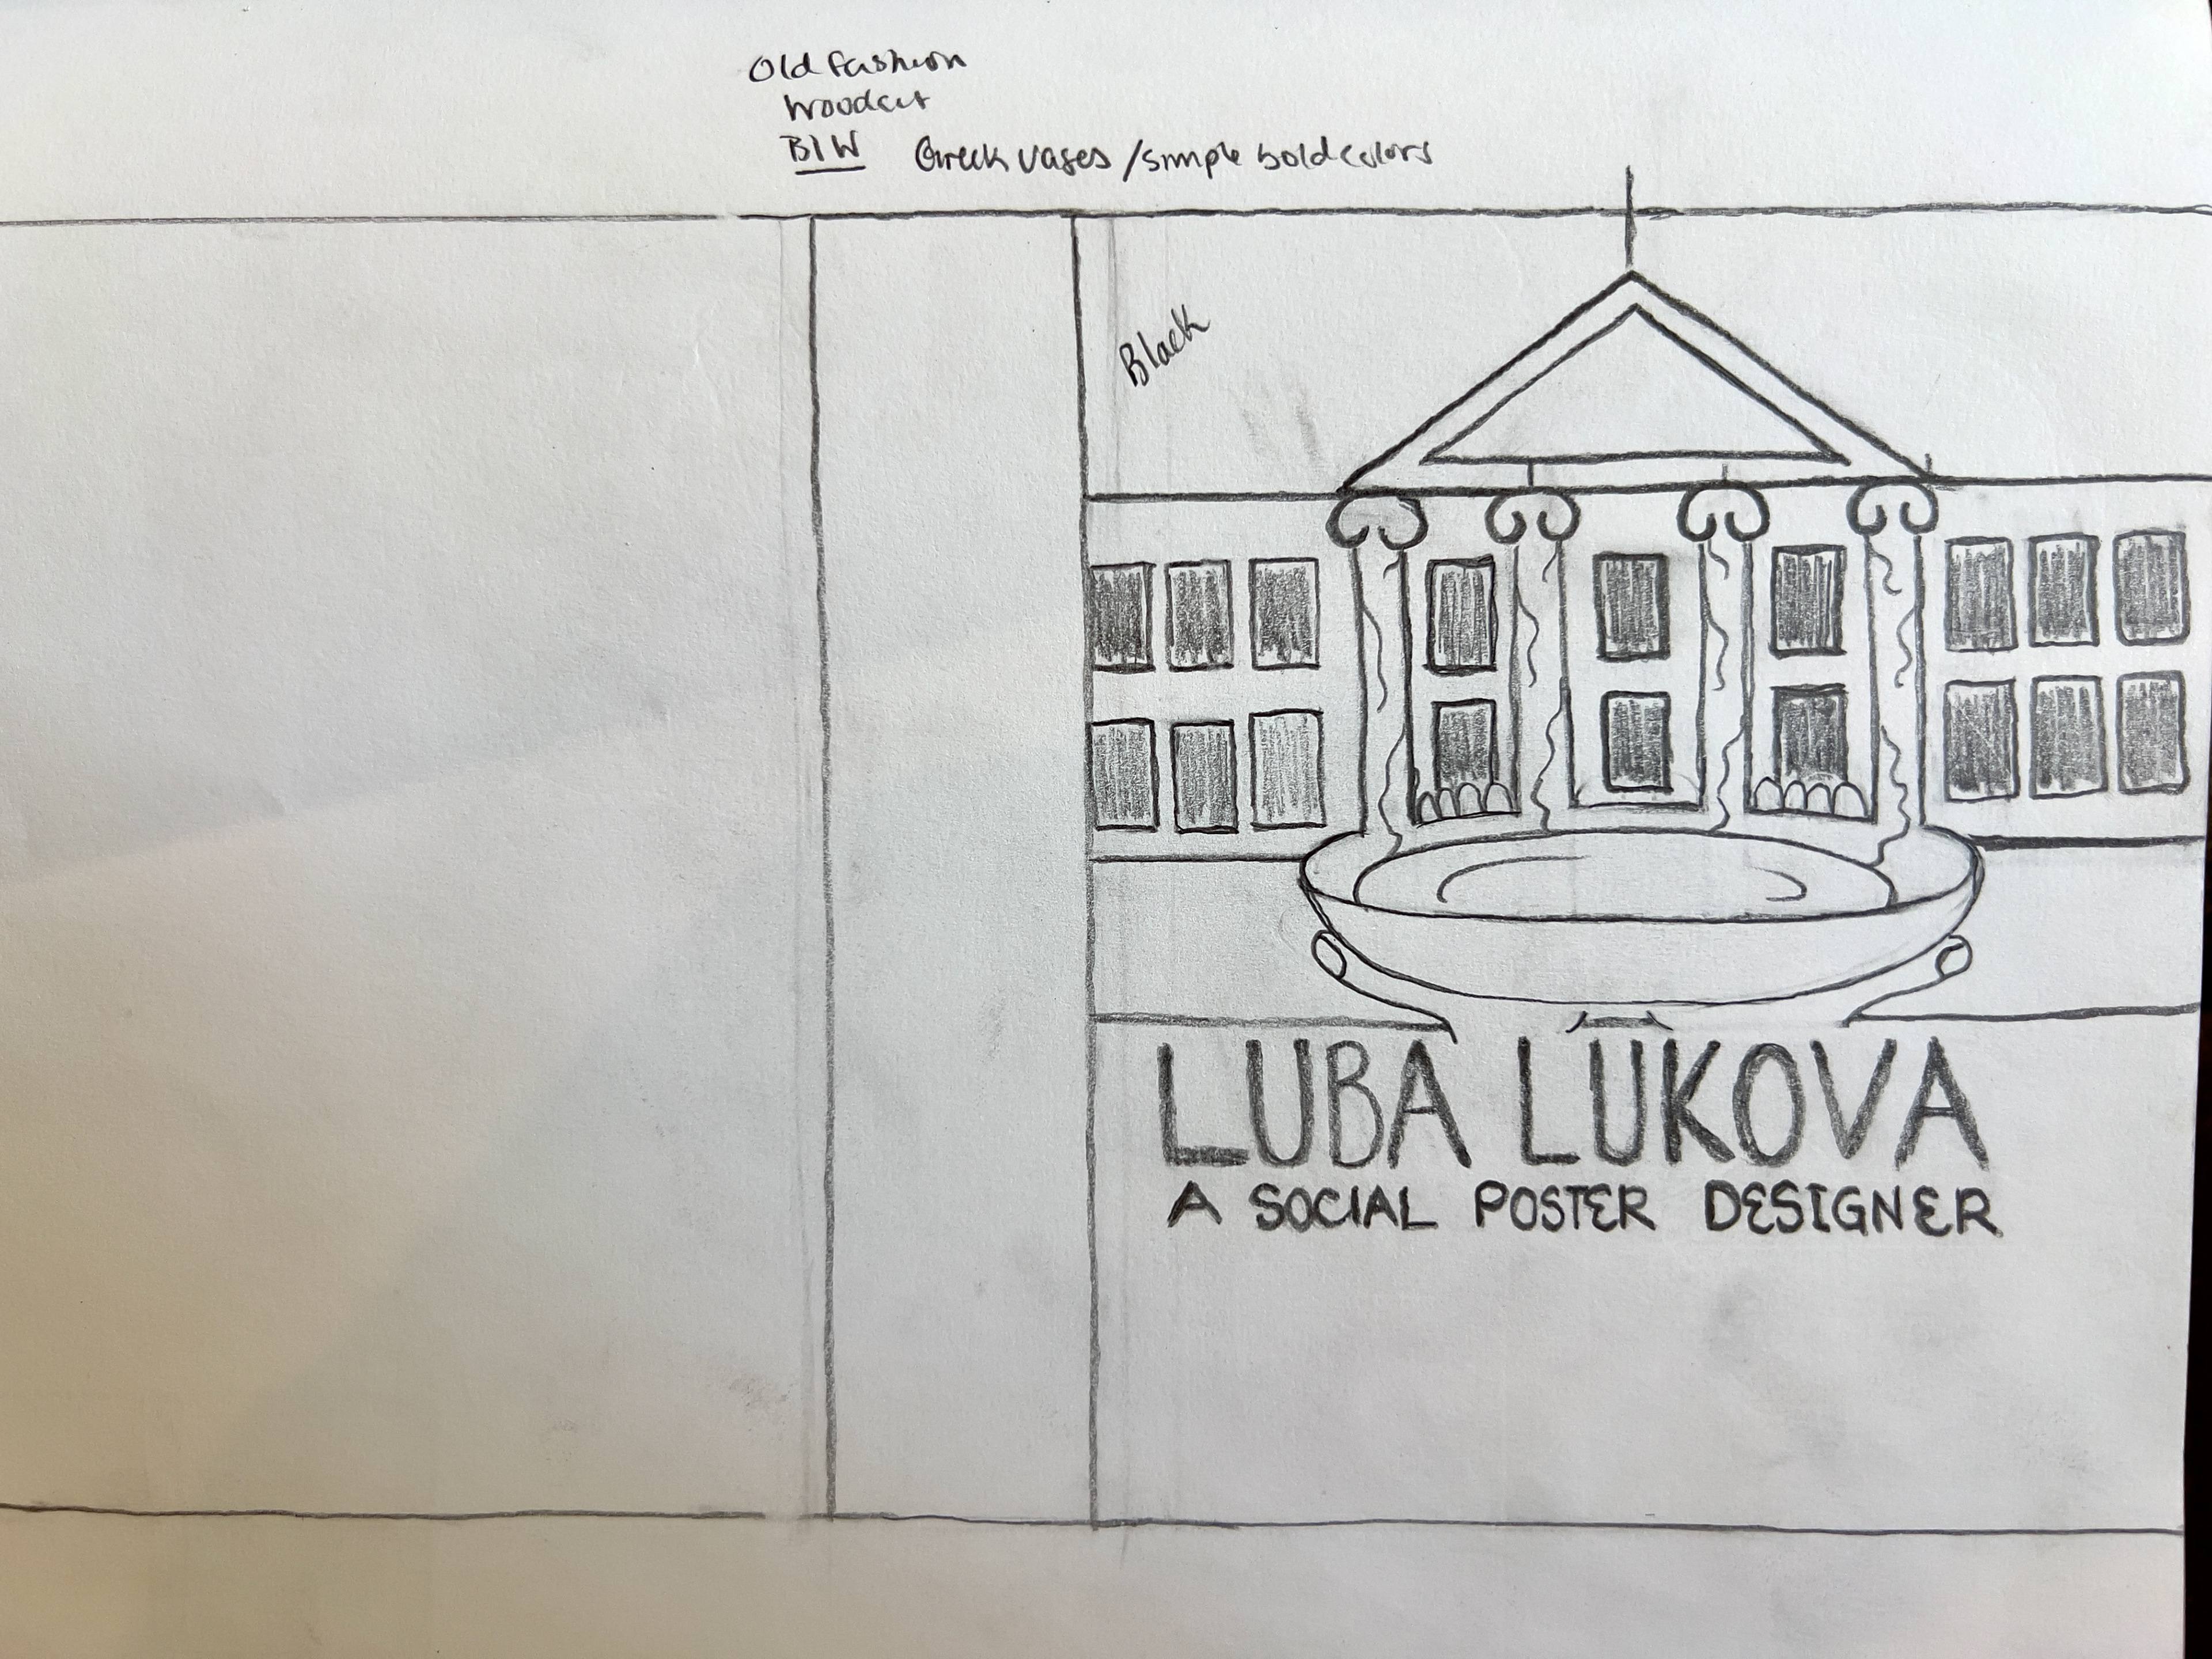
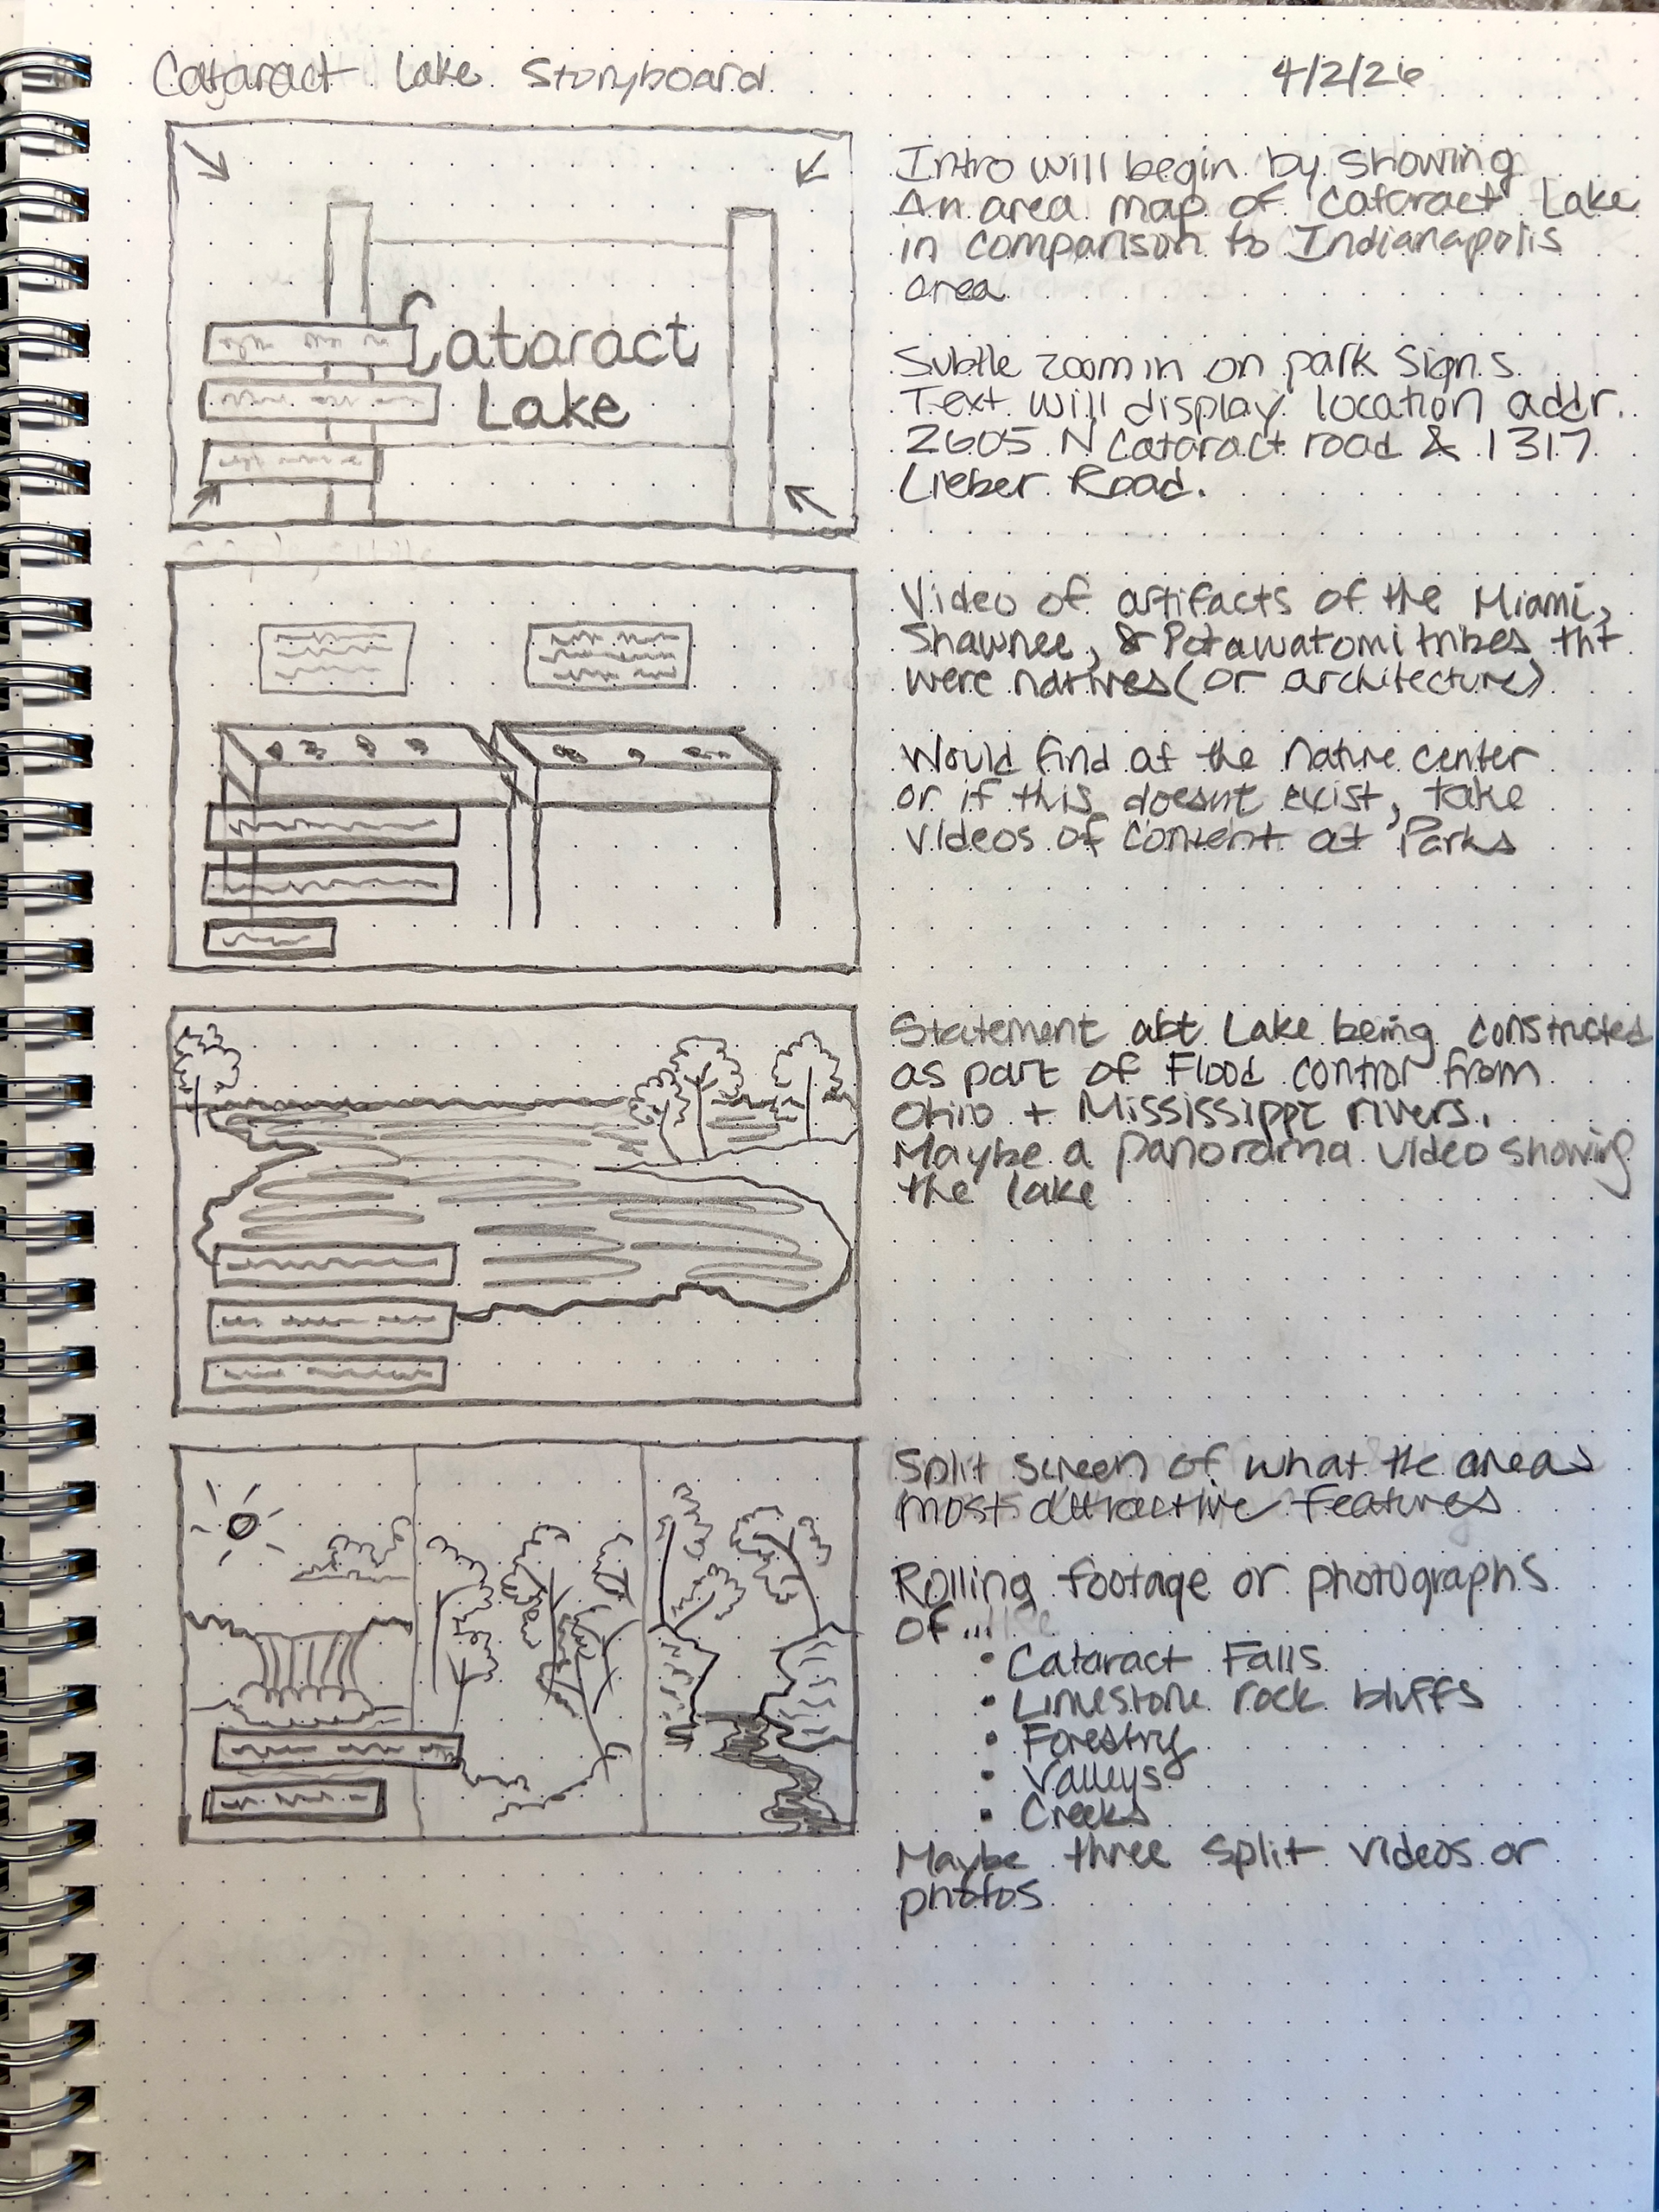
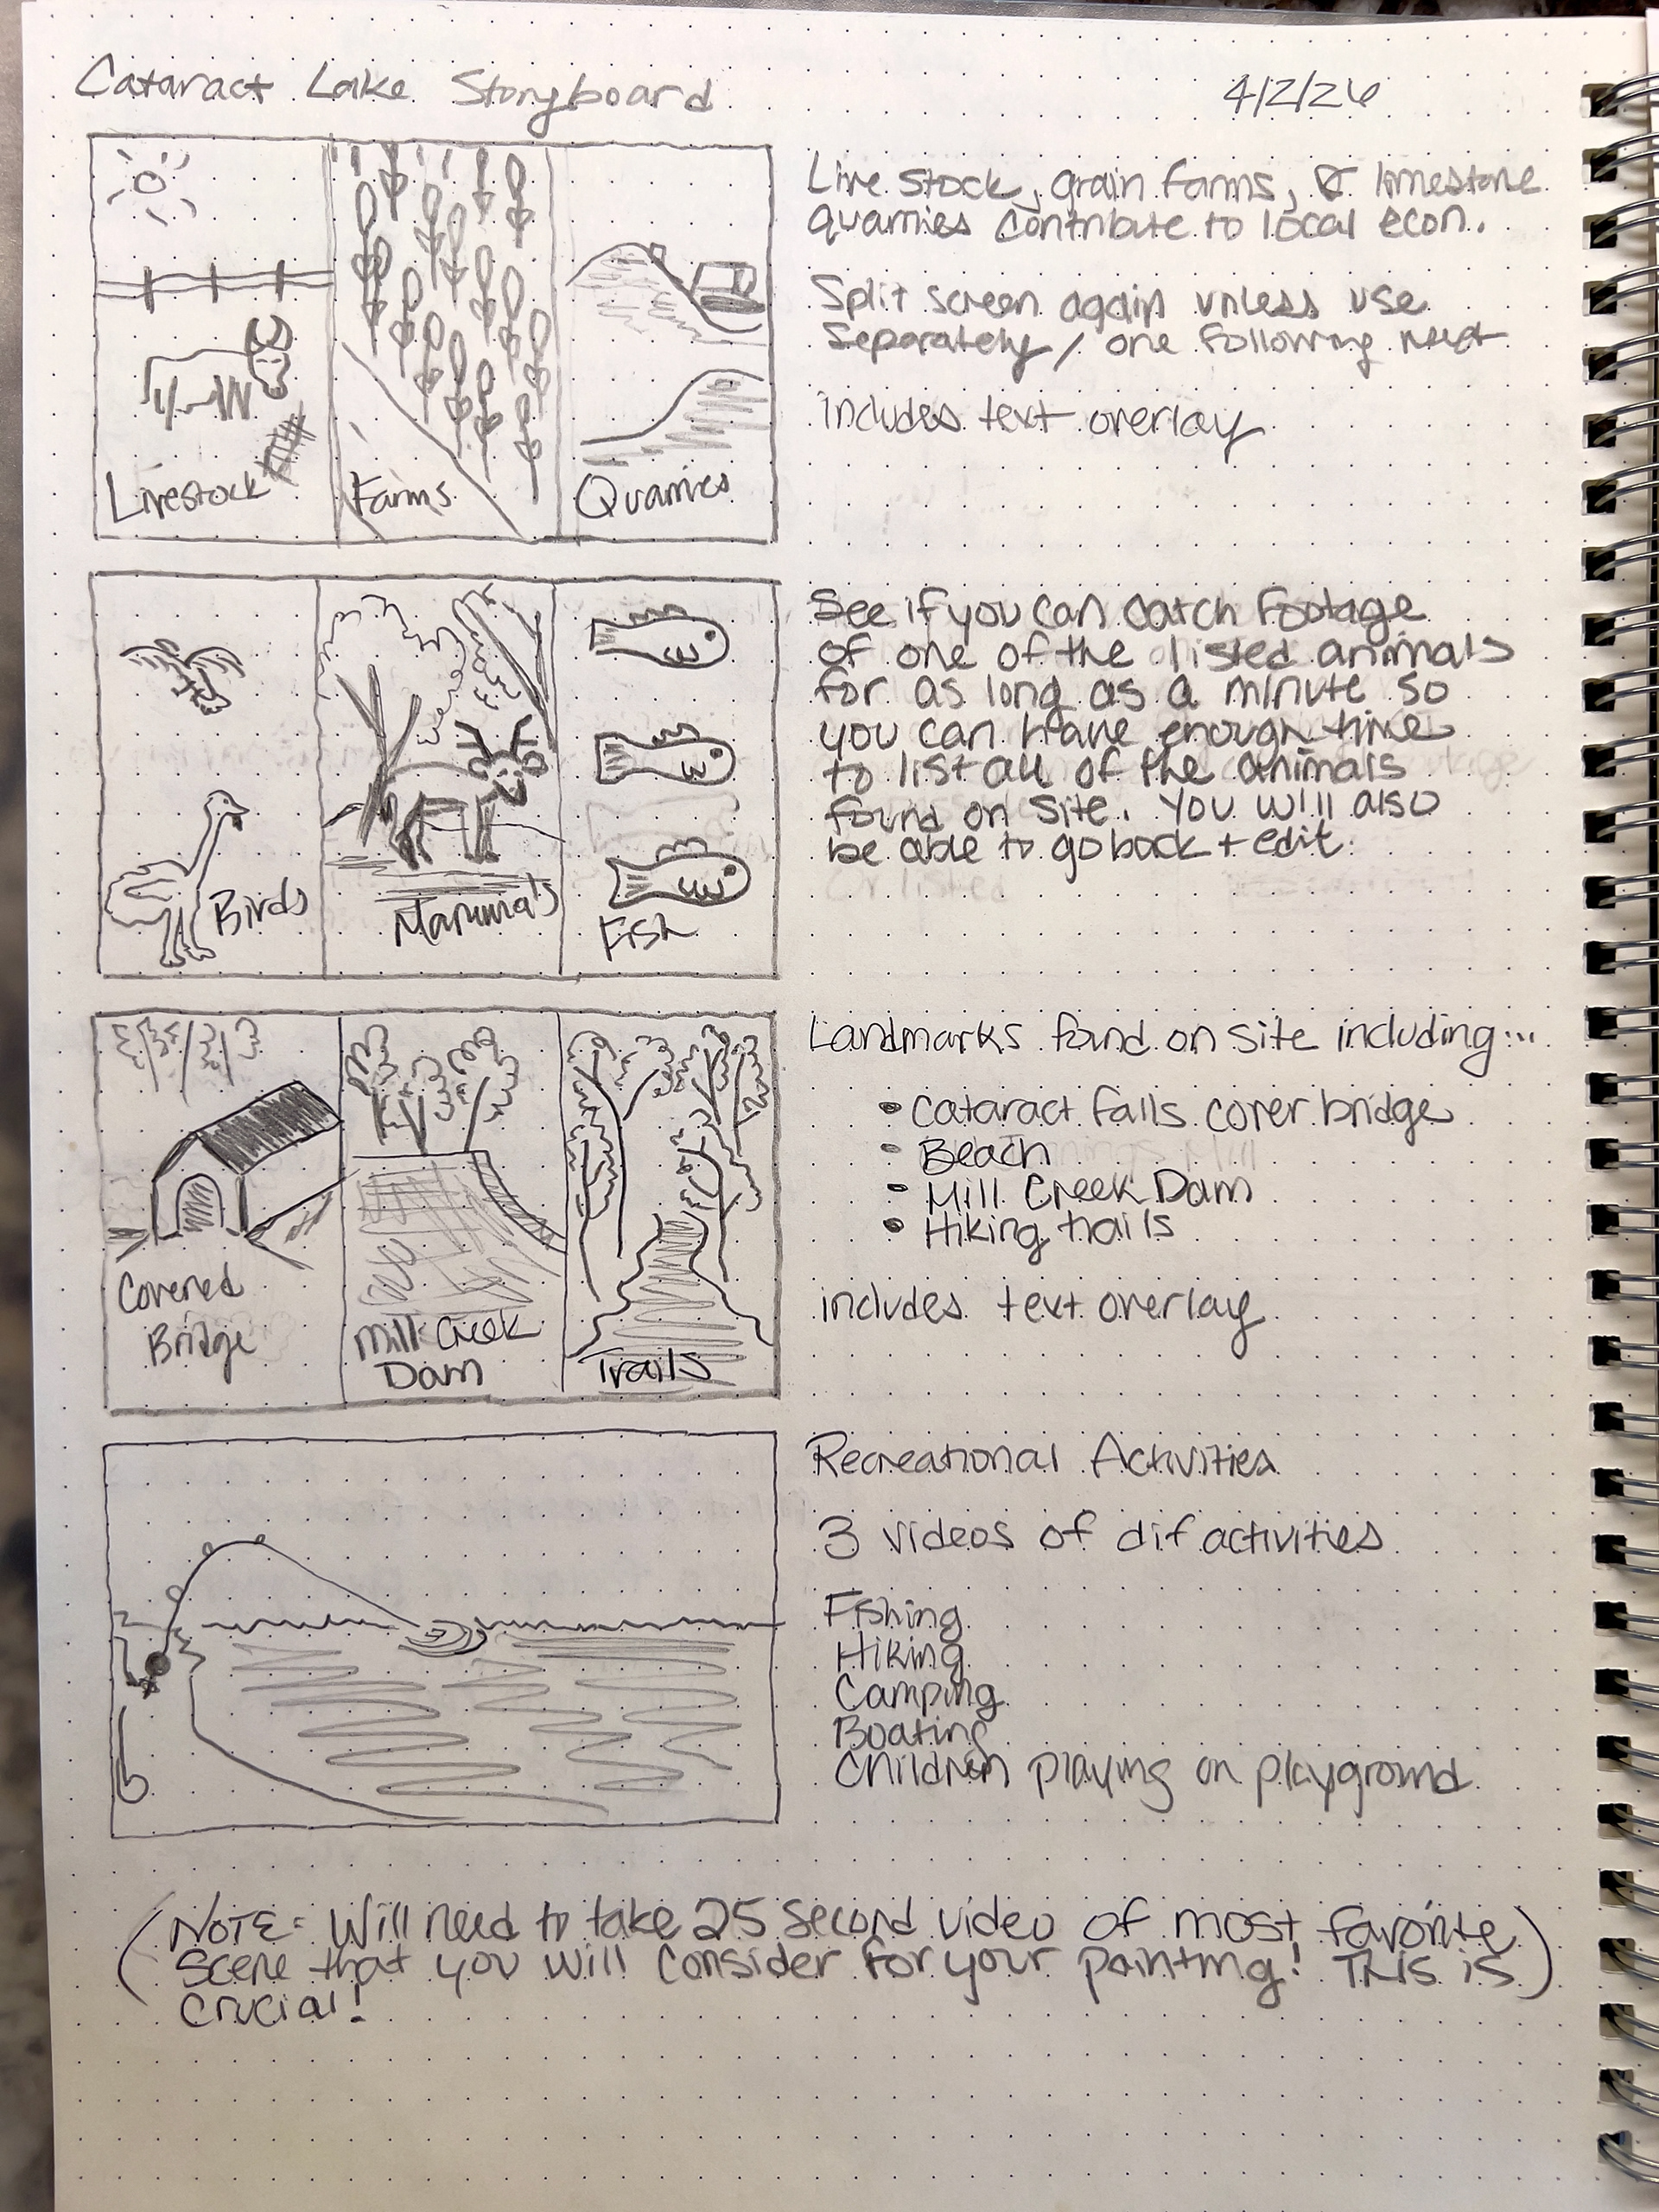
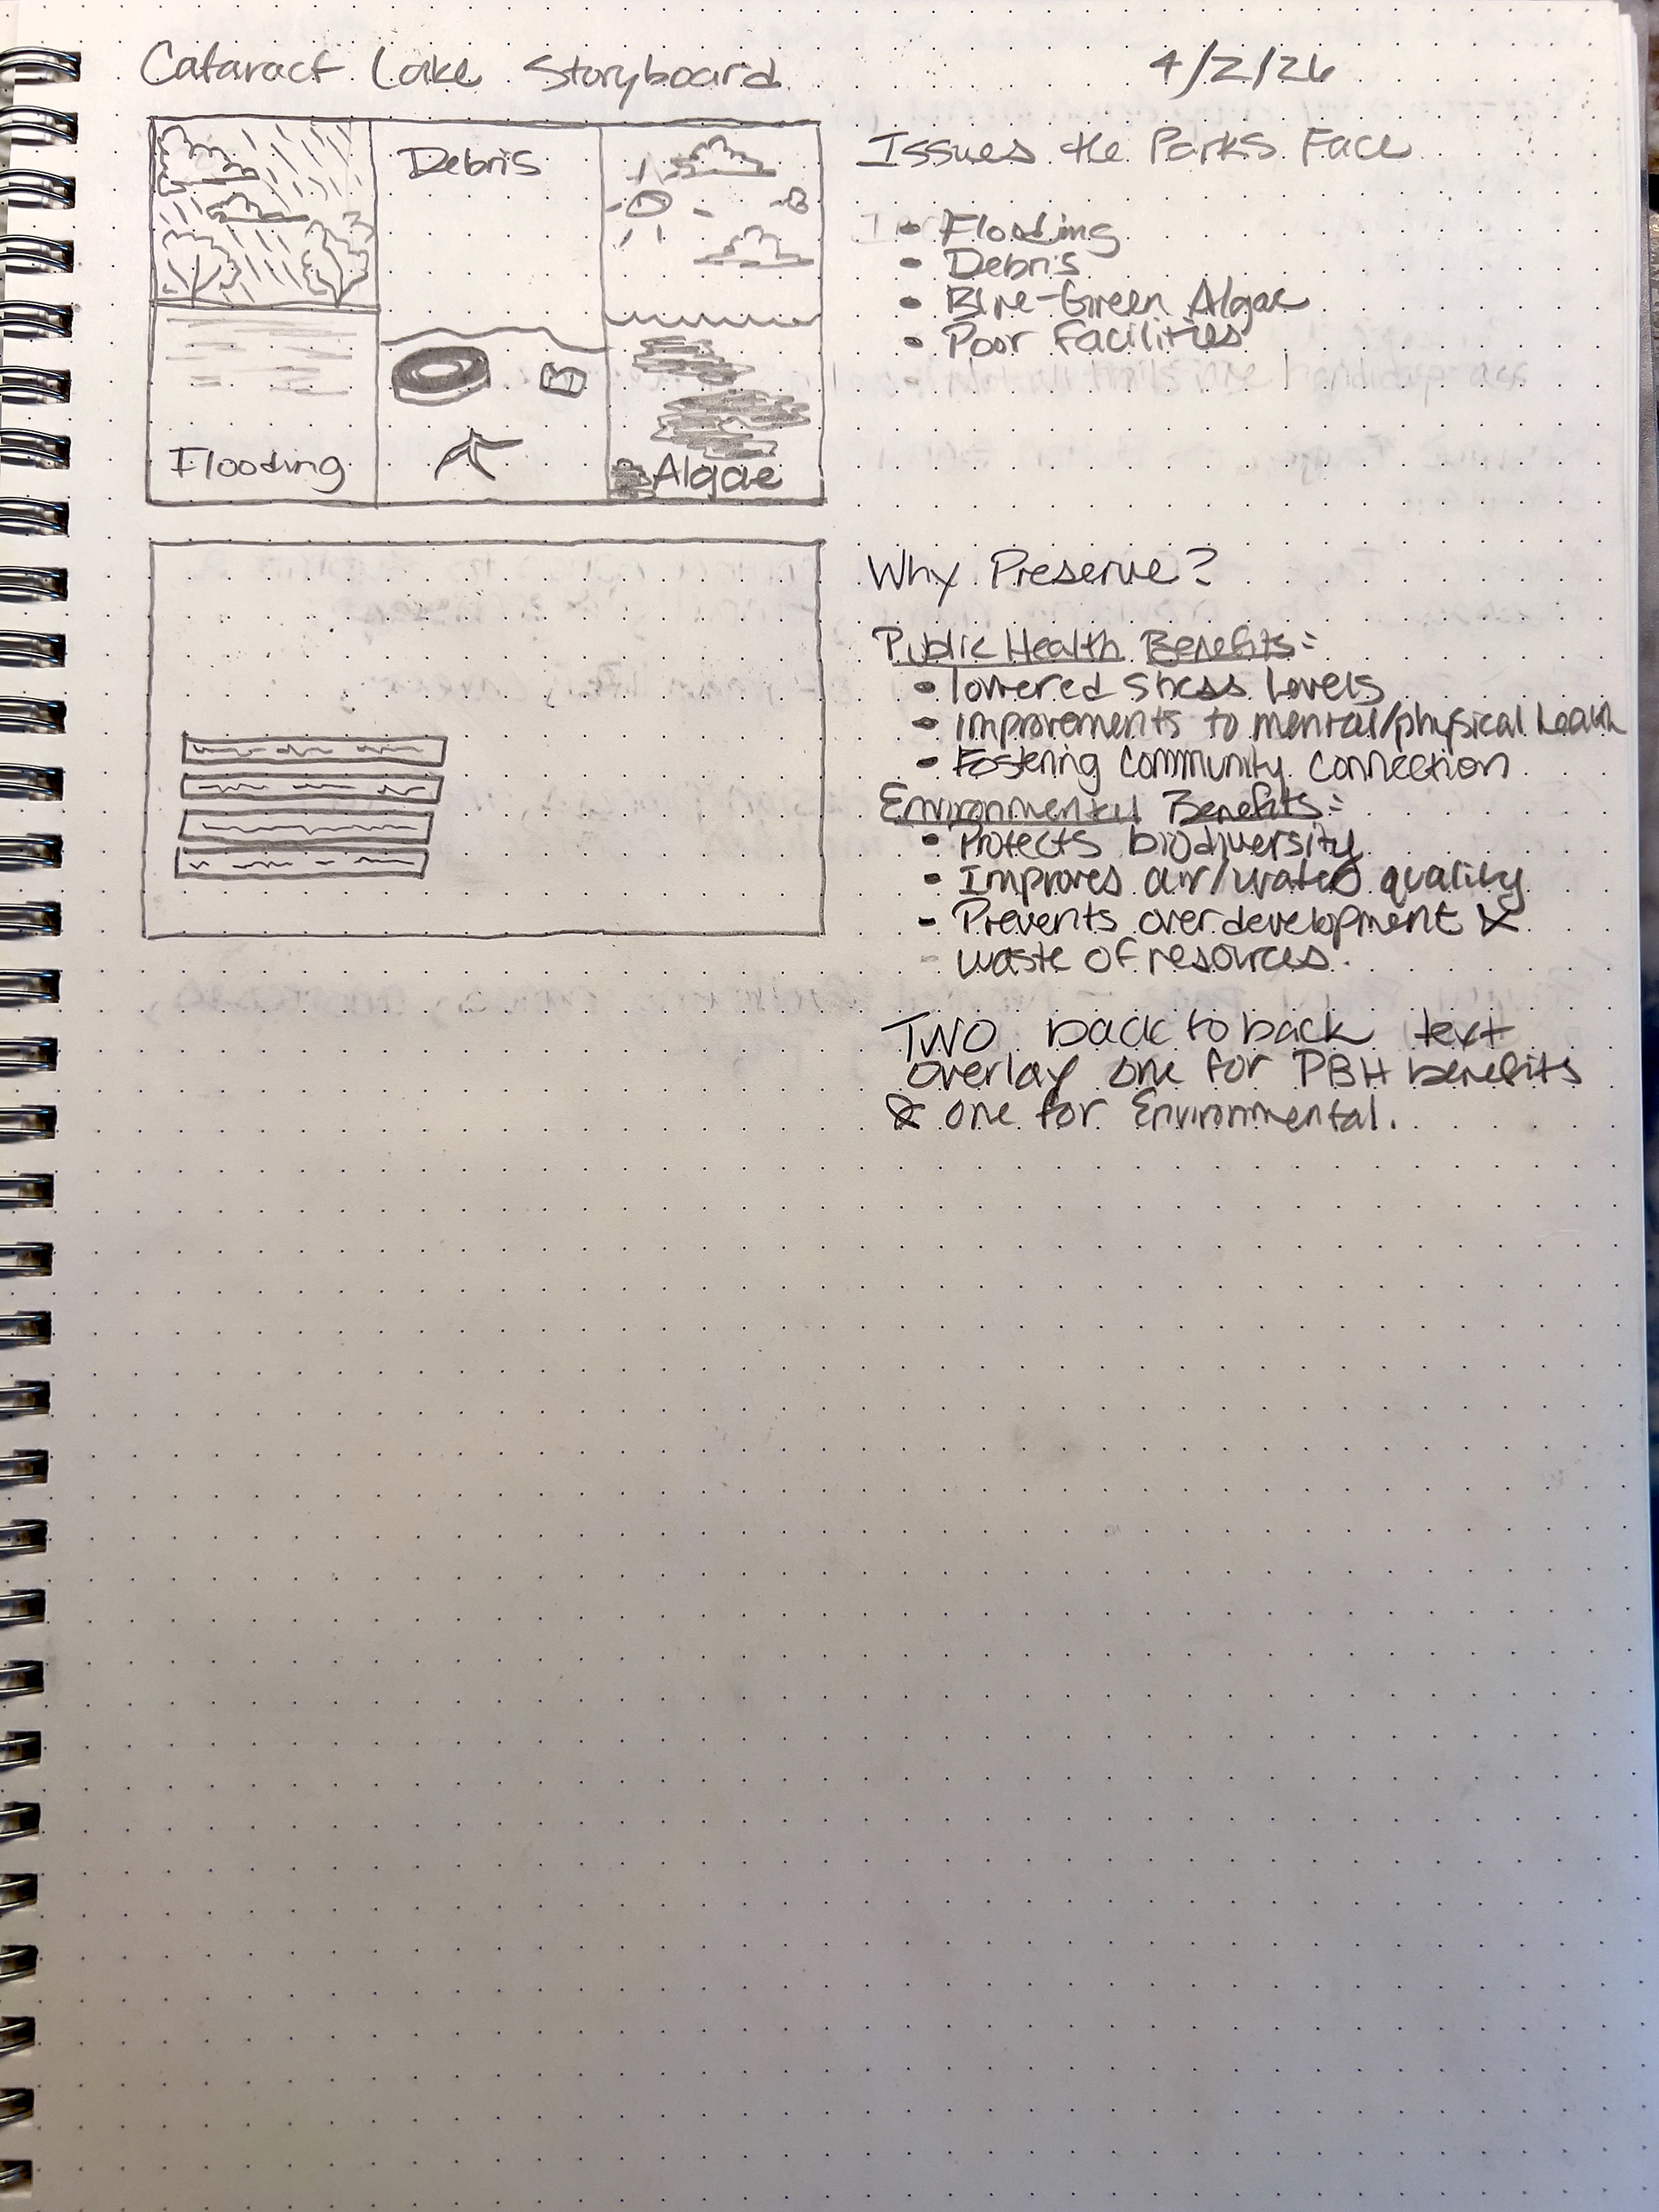
Rough draft formatting depends on the type of project that is in focus. For example, a rough draft for a GIF, animation, or video would more likely require a storyboard. A storyboard will allow you to visualize a sequence of frames adding the component of time to the design process. A storyboard serves as communication for production teams as a visual roadmap. It can include transitions through time, camera movements, dialogue, lighting, shot-type, depth-of-field, characters, their actions, etc. Below is an example of a storyboard for a video short of Cataract Lake in Indiana.
Storyboard Example
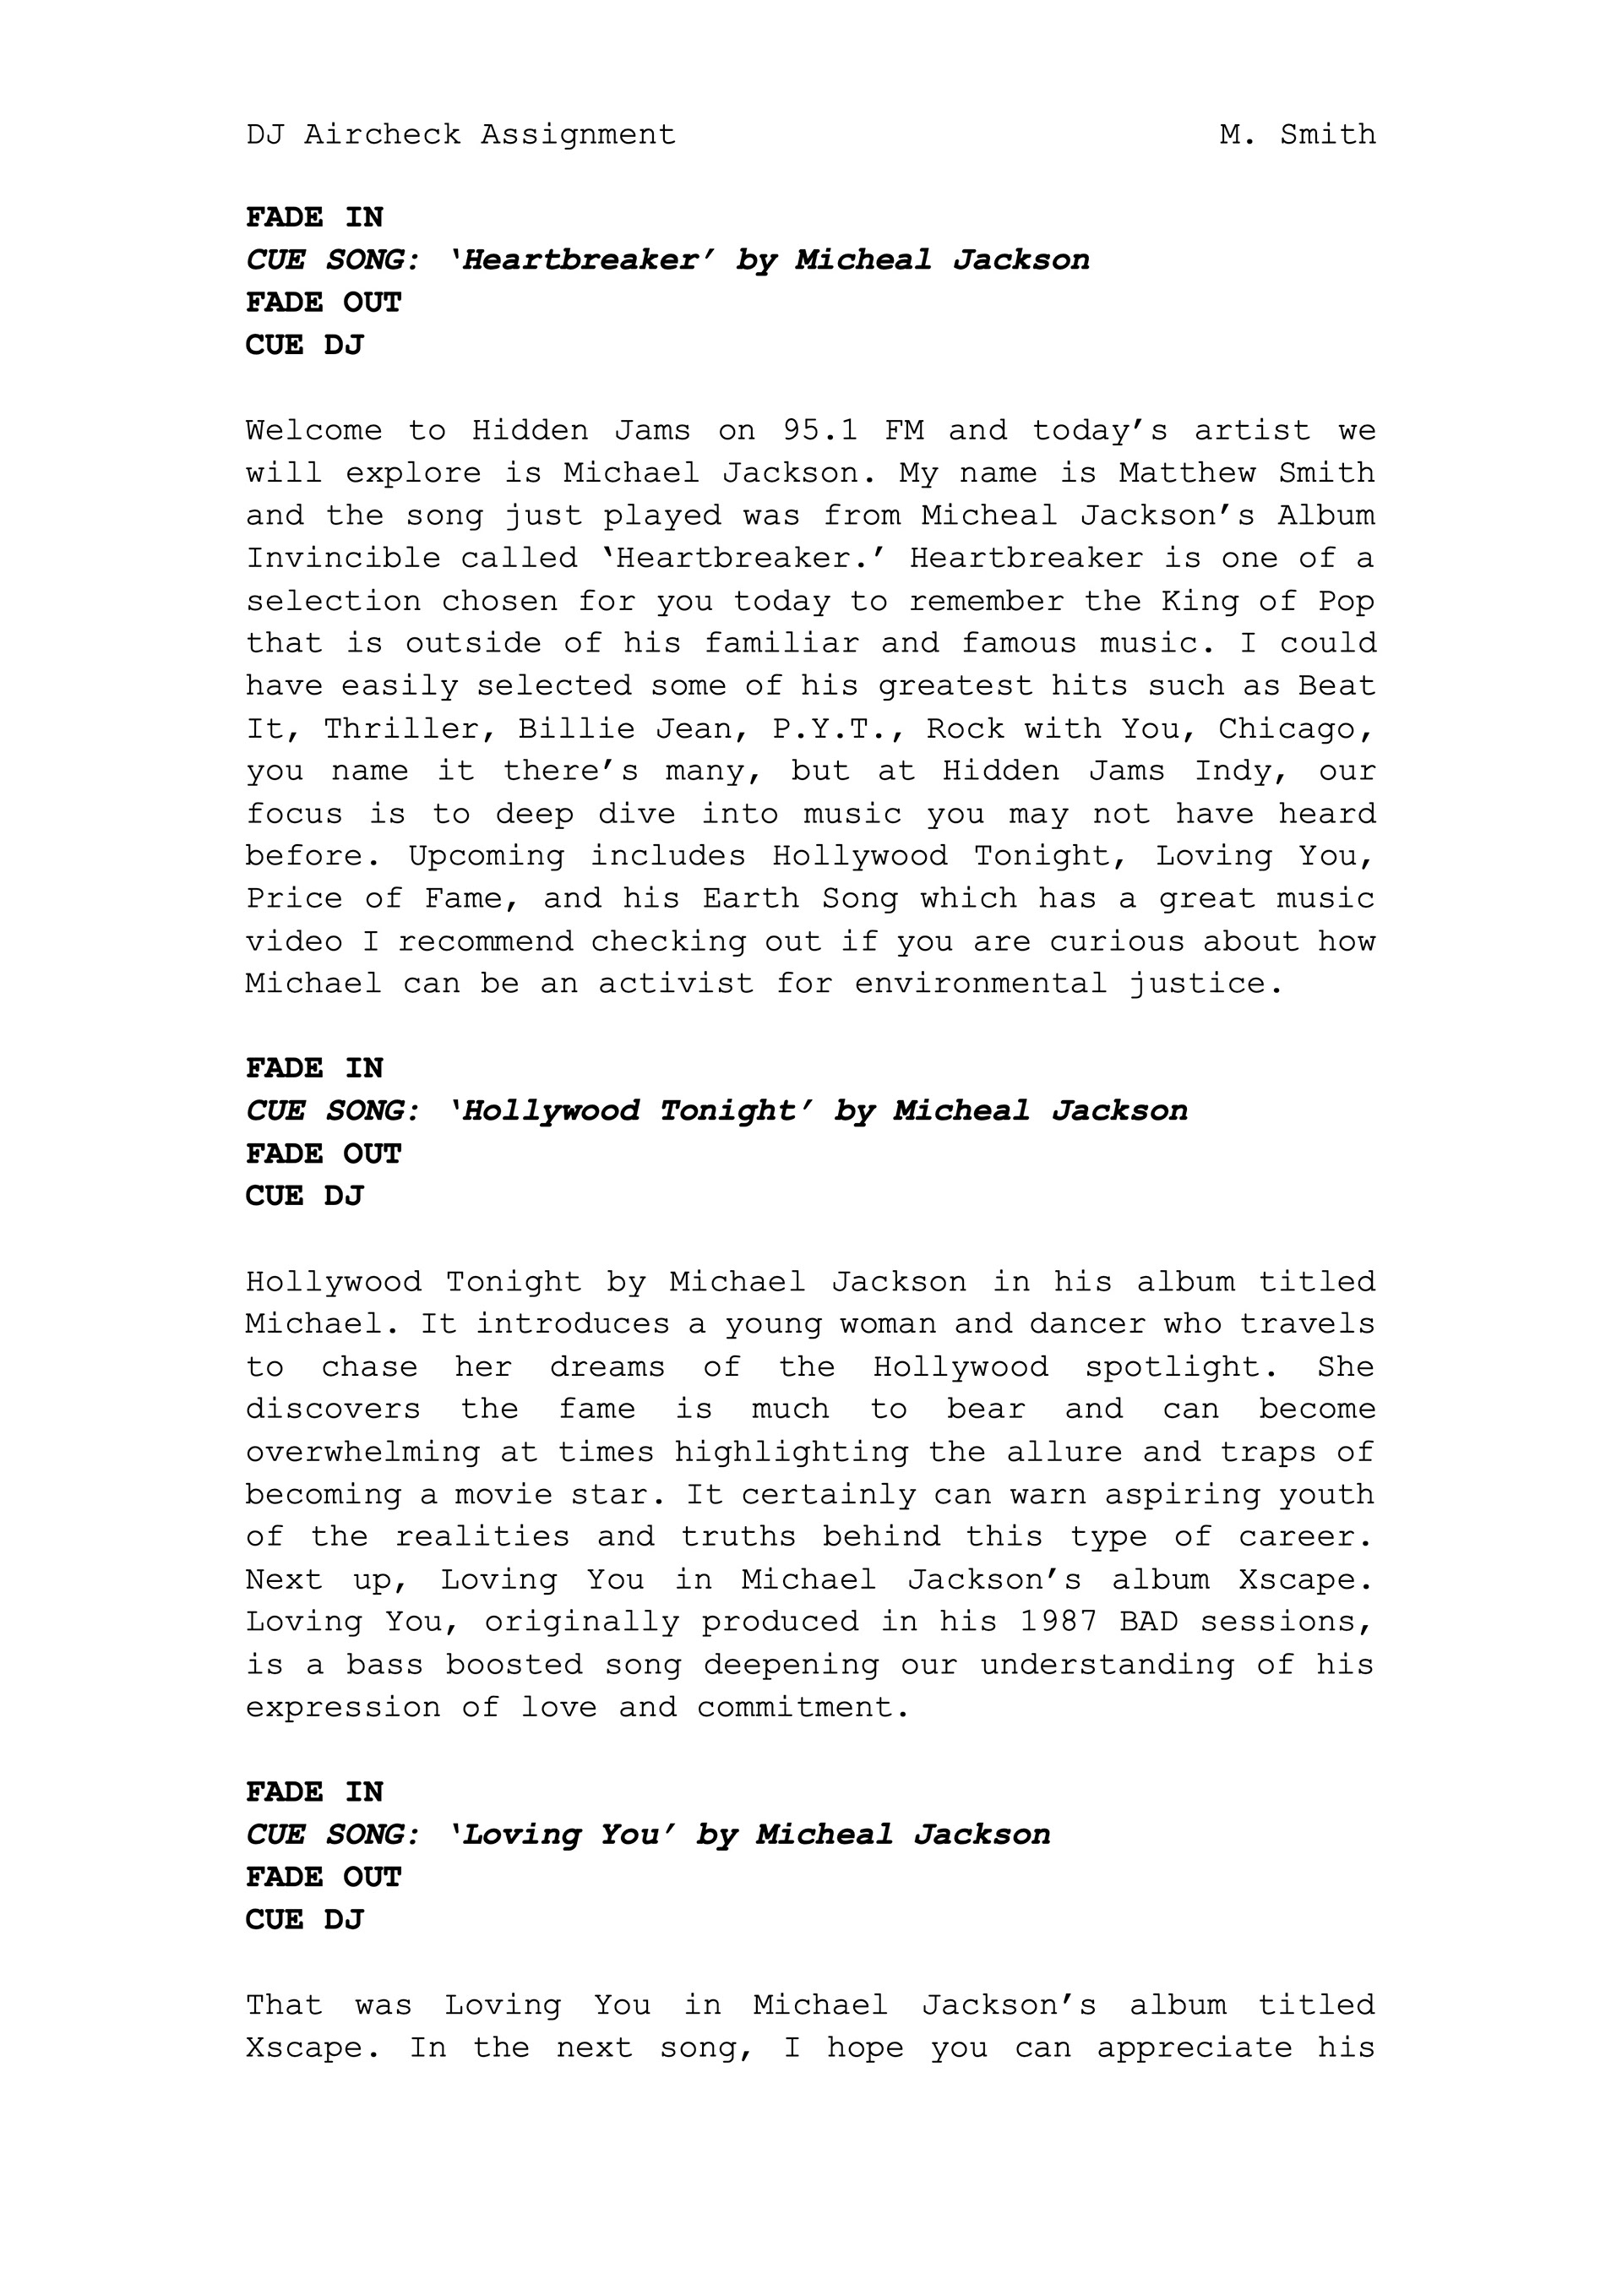
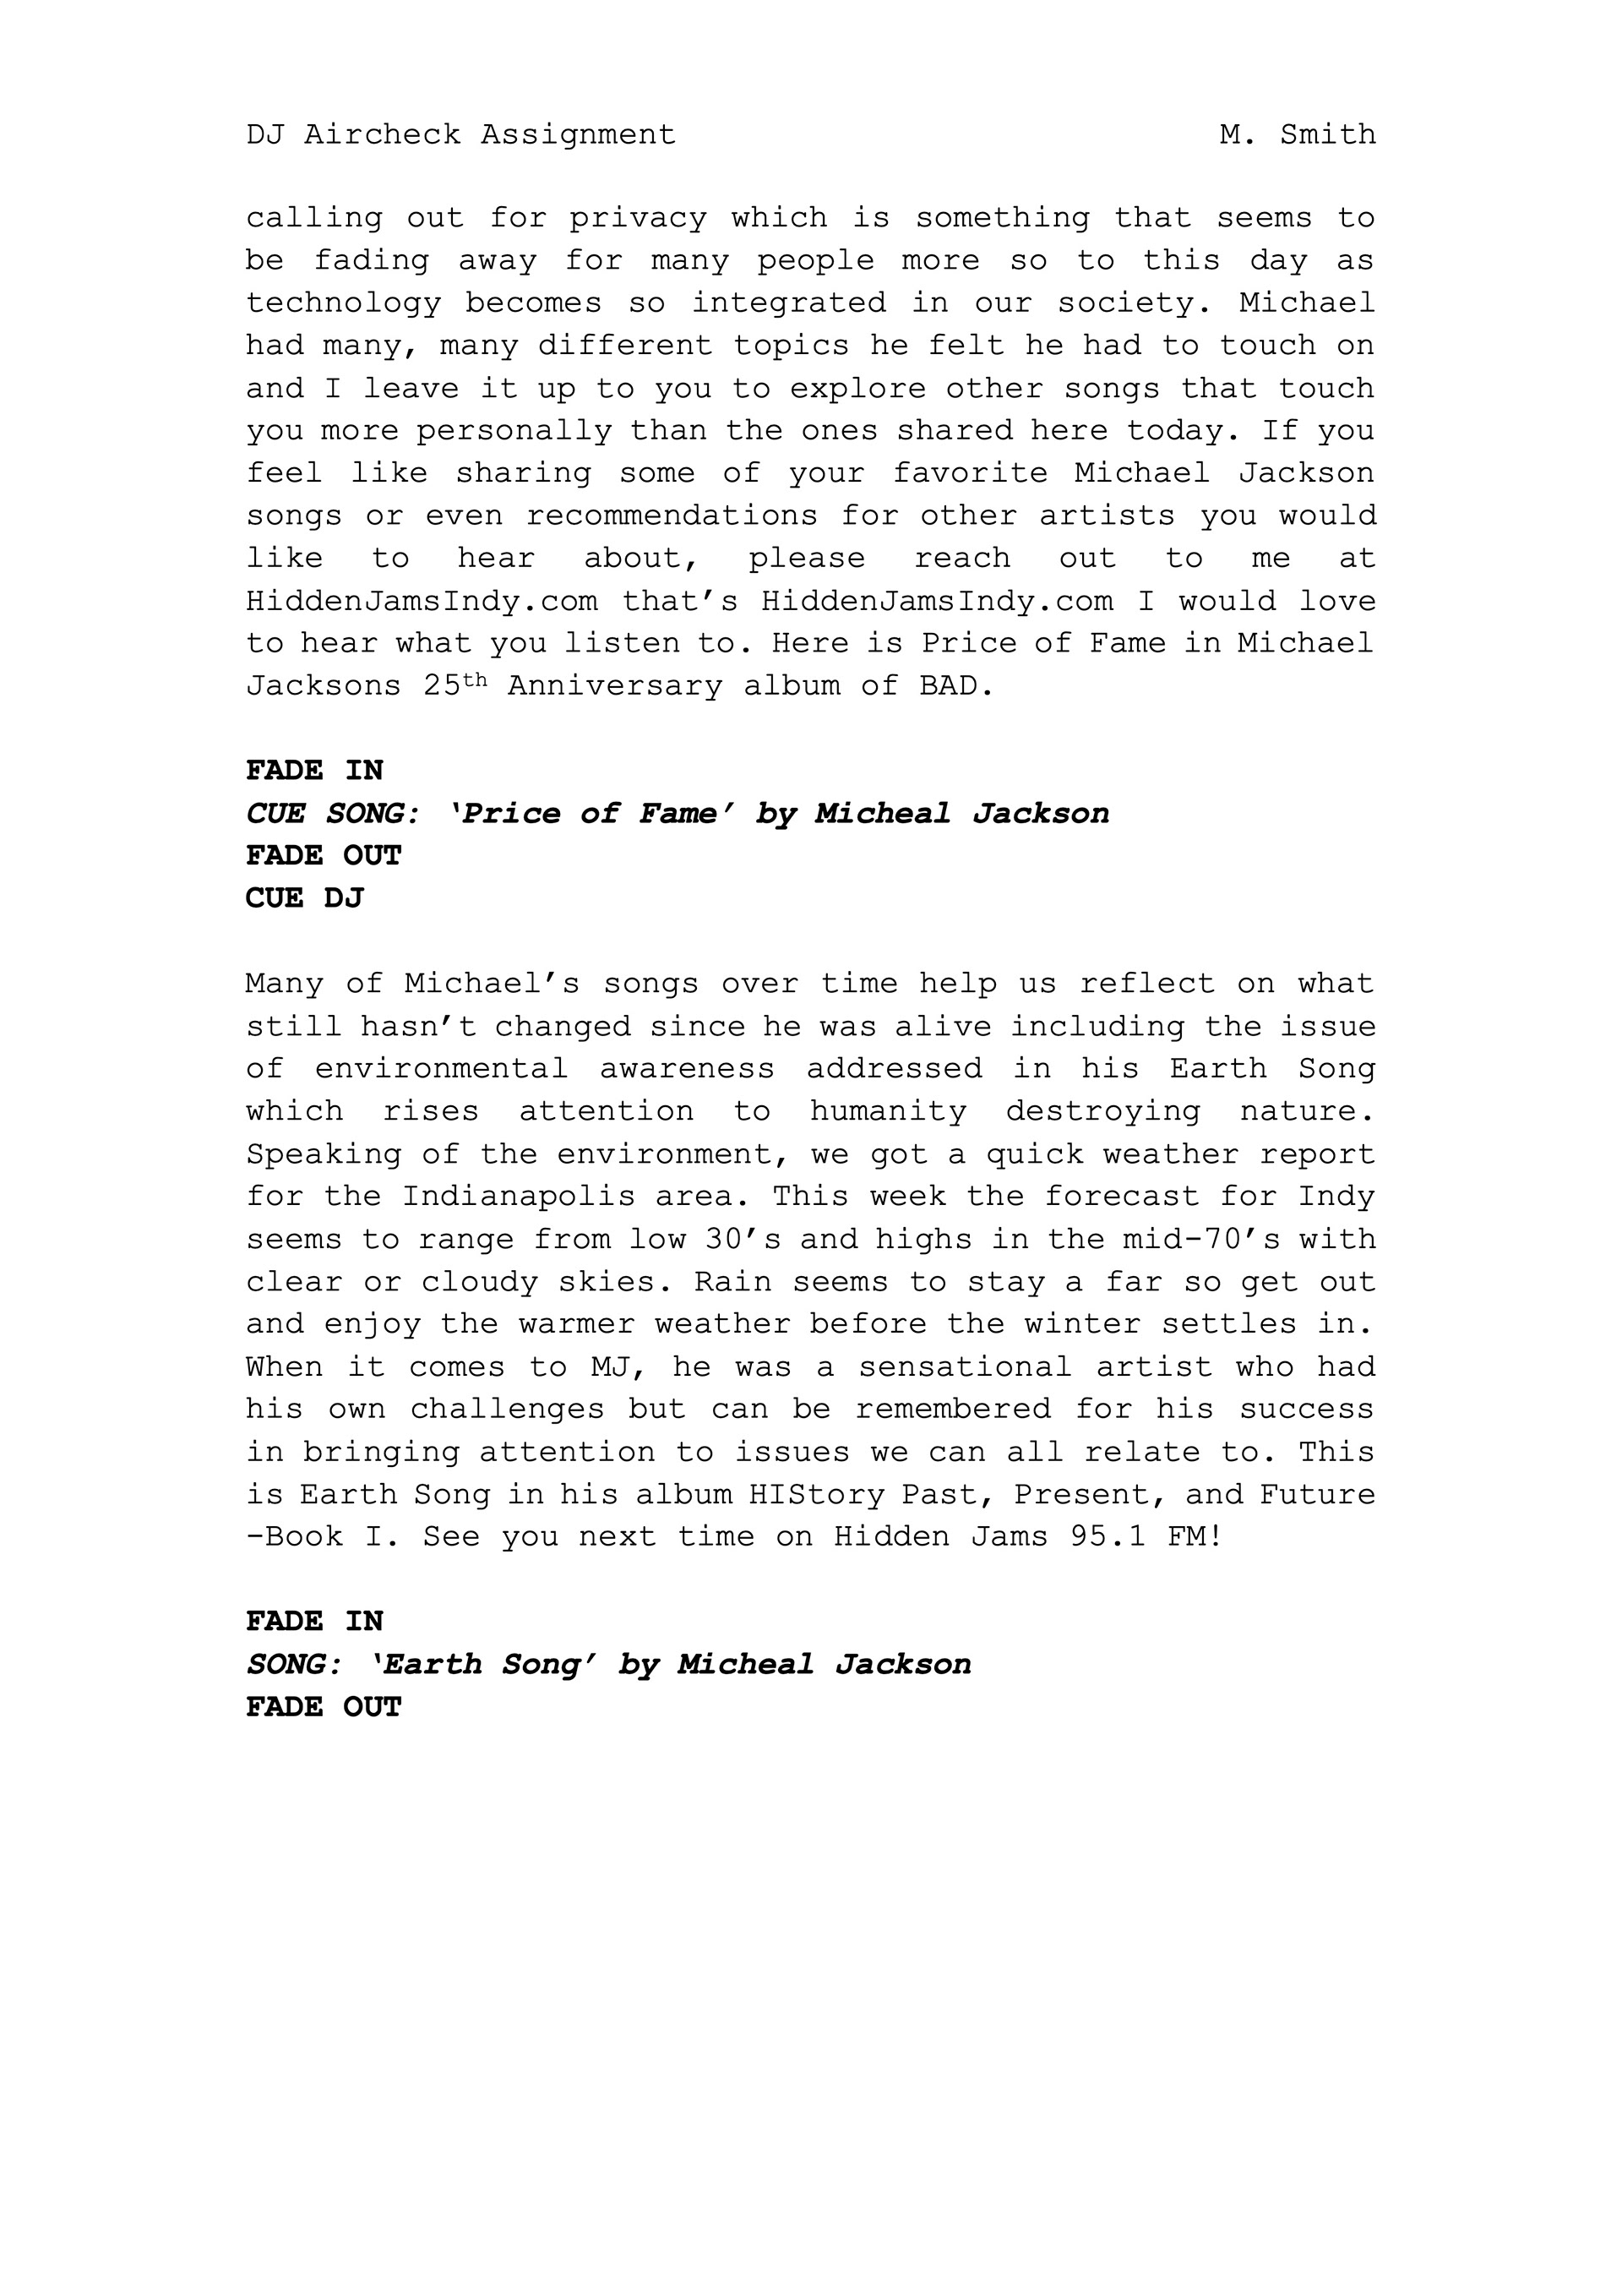
Scripts are another useful tool to help define the dialogue for media. The following example is a script for a DJ air check of Micheal Jackson and a few of his records.
Script Example
For websites, apps, and other digital products, wireframes and prototypes serve as rough drafts for creative layout designs, functions, and interactions making a software's interface and experience user-friendly. The following wireframes are examples of my first responsive concept for a website portfolio developed using the software Figma.
Wireframe Examples
Step 5: Design Review
A design review can occur anytime during the creative process but following a good rough draft is a great time for a review. The review allows the client to provide feedback on the project, explaining what is successful, what is not successful, and what changes need to be made to meet their expectations. Critique for designers is how they develop into better designers. Although positive affirmation is never taken for granted, sharing honest thoughts at the design review will help the project become its best.
Step 6: Revisions
Revisions are made when the designer edits the work following the client's feedback. Sometimes what is accurate in design theory according to the principles and elements of art does not always meet the expectations of the client. A successful designer realizes this, and although they can provide recommendations for the client to think about, at the end of the day, the work is for the client and their specific needs. The client should expect their designer to see their ideas through even if that means design theory is stretched. Be explicit and transparent at each review and the designer's revisions should change accordingly.
Step 7: Repeat Steps 5–6 (as necessary)
It is common, and recommended, that the design process goes through 2–3 series of revisions. It is also notable that the designer has to "wear multiple hats," in other words, maintaining their skills in many disciplines. When reviewing work, there is a high likelihood the designer will have made mistakes in producing your work. Design typically involves a lot of writing and proofreading and many typos are found in the text. So read carefully!
Step 8: Final Draft & Deliverable
The designer has completed all necessary revisions and the product has ideally surpassed all client specifications. The designer will now submit the original file(s) and mockup(s) as deliverables to the client using a secure file transfer platform.
Step 9: Feedback for Designer
If the designer has left a positive impression, or if there were challenges you would like to mention regarding the process, leaving feedback, for the client is always impactful to the development of their career.
If you enjoyed working with your designer, there are many ways for you to support their mission including:
1. Following them on social media
2. Endorsing them on LinkedIn
3. Writing the designer a testimonial review
4. Sharing their work with others
These are just a few ideas that could make a huge difference to the designer's career.
Didn't enjoy your experience? All feedback is encouraged. Share with your designer how they can improve their work by informing them of any gaps in understanding. Ask them direct questions, and mention any concerns in a professional manner and setting.
Step 10: Feedback for Client
A great designer will happily return the favor in kind!
There you have it. The design process in 10 steps! A brief reminder that every project will require unique changes to accommodate each client's specific needs. While some factors might differ slightly, this overall process aims to help the client feel confident about working with a qualified designer, because they will add both a system and structure to the project or team.